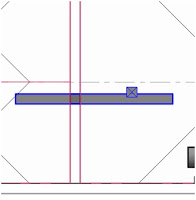
Start by drawing your ducts as a single run:
Add a section and then change to the view:
Use the split command (on the modify panel to break the duct into three pieces (check the delete inner segment option) Note: the program will add a union if the duct type has it included – if it does, delete the unions):
Move the middle section to the elevation you want – and if you want to slope the duct or pipe, stretch the ends back to give yourself a little room:
Right click on the grip on the top duct, and then just draw the duct down to the lower duct – you can draw it at any angle as needed:
Once the layout is done, you can edit by changing the elevation of the flat runs of duct, or use the grips on the fittings to move.
So the final result is that you avoid a conflict – and it only takes a few seconds in section view to fix.
Side note – if you’re using AutoCAD MEP, you can do the same thing – just make sure you check your duct routing options, and turn off the Automatic Create New Riser at elevation change option, and you can create sloped duct or pipe!
Get routing!


No comments:
Post a Comment