Here are some high level step-by-step procedures you can use:
1. Make a copy of the master drawing located in the AECB Content folder.
2. Open the master drawing for the type of device.
3. Use the block editor to locate and edit similar block symbols of the desired part. Once the block is open, use the Save As icon to create a copy, then edit the copy. When naming the block, use lower case letters so it can easily be differentiated between OOTB content and custom content.
4. From the electrical menu, go to device > Styles.
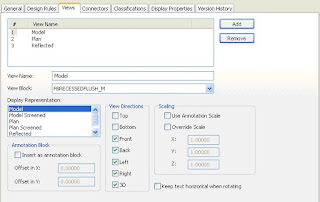
5. To edit an existing style, go to the views tab first, and note the name of the plan view block – that should be the block that was edited. If the block was duplicated to make a new version, change the view block to the new block.

6. Change the view block for both the plan and reflected view names.
7. If the item is to adjust its size with the drawing scale (such as a receptacle or switch), make sure the Use Annotation scaling option is checked.
8. If the device style does not exist, take a device that is similar to the desired device – right click on the style in the style manager, and then choose Copy. Right click again and choose paste to create a new style. Edit the copied style and change the name to the new style.
9. SAVE the drawing after each main step or new style. Audit frequently.
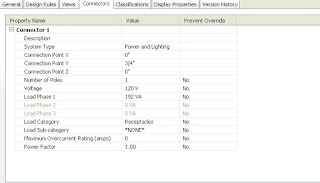
10. Once the style is created, edit the connector styles for the following items:
- Number of poles
- Voltage
- Load Phase 1 if single pole, edit all if 3 pole
- Load Category
- Description
- Y Connection point.

11. After the connectors are edited, go to the general tab.
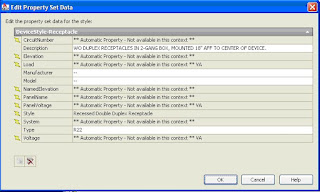
12. Select Property Sets. If the desired style-based property sets are not in the drawing, load them from the master schedules and tags drawing under the styles folder (which is lcoated in the ALL USERS documents and settings folder.

13. Anything that applies to all examples is style based, and should be part of the property sets in this master drawing. Edit as specified by the client to include default values, so schedules can be populated as needed.
14. If changes are made to the property set definitions, make sure they are copied back to the master template so they match. This way, the default values won't be overwritten when importing the symbol.
Hope this helps - thanks - David B.
2 comments:
I followed the steps to create a wall mounted occupancy switch by copying an existing switching device. However, for some reason, the text "OC(Occupancy Sensor)" appears too small on a drawing once I place it. I am not sure why.
Can you tell me what I need to do to fix the problem?
Thanks,
could be a couple of things - make sur eth etext style you're using for the label is annotative, so it scales correctly. If you simply changed the text to read OC from an existing style, it should work just fine. You can email me a drawing with the tag and I'll take a look - send it to dabfvnc1@nc.rr.com. The response may note be too quick, but I'll try to get to it as soon as a I can.
thanks - David B.
Post a Comment