Tuesday, December 22, 2009

Finally back on the bus - AU is in the Can!


Thanks to all the folks that came to my classes this year at Autodesk University earlier this month. It's been a tough year for a lot of folks, and that makes the fact that people were willing to spend the money and attend this year's event in person makes it more special. You took the time to sign up and show up, and hopefully you weren't disappointed. The last class was especially fun - here's a picture to prove it.

How many people are willing to put on our special 3D glasses, and stand up and join the fun? Thanks to all that take their fun and games in training so seriously!

A favorite recent quote was sent to me by Nancy Tremblay, a good friend and Autodesk employee on the Autodesk Learning side - it's from Benjamin Franklin:

"Tell me and I forget....teach me and I remember...involve me and I learn"

Again, thanks to all for a memorable AU, and have a safe and Merry Christmas!

Cheers - David B.

Monday, November 23, 2009

Revit MEP Piping Content For Sale from Andekan

Found a content provider (Andekan) that has a library of plumbing piping fittings - these are NOT free, but are available for purchase. I haven't downloaded any of this to test for accuracy, but if you're looking for this content and are willing to pay for it, here's the link:

http://www.andekan.com/revit-families-buy-and-download-content-packs

These guys were formerly with Broutek, and founded this company a couple of years ago. They have content for Charlotte Pipe cast iron and plastic, Nibco, American Standard and more.

If you purchase any of this, please let us know what you think -

thanks - David B.

Friday, November 20, 2009

AU and Certification

Autodesk is planning on offering free associate and professional level certification exams at AU this year, for the following products:

AutoCAD
Inventor
Civil 3D
Revit Architecture
3D Studio Max Design

There will be exams for both 2009 and 2010 available. If you're not going to be able to make AU, you can still take the exams at any one of our ATC sites (for a nominal fee). If you're trying to add to the resume, and make yourself more marketable to potential employers, this is an easy way to do it. And if you're an employer, a certified professional in any one of the products gives you a good idea of their skill level, whether looking for new employees or testing existing ones.

At the ATC Summit at AU this year, I'll be speaking for a few minutes during the first part of the meeting about how ASI is taking advantage of this program to help our clients, so if you're in the ATC program, I'll see you there!

later - David B.

Editing the Size of the Tick Marks on Pipe Fittings

While messing around trying to create my pipe flanges, I've been opening and editing the generic fittings family. One of the parameters in these parts includes the tick mark size. By default it's a formula:

Tick Mark: Fitting Outside Diameter * 0.4

To make the tick mark smaller, change the mutliplier to a smaller value, i.e. 0.2 - this will make the tick mark shorter than what shows up by default. You'll need to make this change on any of the fittings you're using, so edit each type - to change, use project browser, go to families, go to pipe fittings, right mouse click on the fitting family and pick Edit. When the family is open, select Type on the far right side of the ribbon. Change the value in the formula and then pick OK. Next, use Load into Project to load it into your current project or template, and make sure you choose the Override family type and parameters option, to make sure the value is updated.

Try it out - and see if it makes your plumbers happier!

thanks - David B.

Thursday, November 19, 2009

Revit MEP - Victaulic Pipe Library

I'm all for more accuracy in the Revit MEP model, and Victaulic has made this much easier in regards to creating grooved piping layouts. They've created Revit .RFA families and lookup tables for fittings, valves, etc. and posted them on their website. So if you're looking at grooved piping for IPS, fire protection and more, check out this website:

http://www.victaulic.com/content/autodeskrevit.htm

I've downloaded the whole thing, and will be testing them out on my next project.

Check it out - David B.

Wednesday, November 18, 2009

Having Fun with Flanged Duct

Been working a bit with contractors that need a more accurate representation of duct. One client is needing flanged duct system, so I ran a little experiment. I created a union from scratch (since the one that came with the program didn't really represent a true union - no union is solid, it's a void).  I created a simple solid rectangular form with a void in the middle. Next I added reference planes for the height, width and thickness of the the connection. After these were defined and dimension parameter labels added, I added a flange dimension parameter. All of these were instance based.

So here's what it looks like in the family:


So, in a plan view, you get this - the union breaks the duct, and places the flanged fitting in place of the split, provided the duct type specifies this fitting:


And since the fitting has a void in it, the end of duct or section through duct shows the rise drop style correctly:


Thinking beyond just a union, you should be able to add the same solid and void geometry to a copy of the plain end fittings the program has included, to create a better representation of the duct - which shoudl substantially help when it comes to coordination and interference issues in tight spaces.

Next - parametric duct and pipe hangers....

Thanks - David B.

Wednesday, November 11, 2009

Location for the Revit MEP Books...

Since I've been getting some requests for the new advanced book, I needed to make sure it was easy to find, so here's the link:

http://www.clickhereforsolutions.com/estore/asi/c-7-publications.aspx

This will open our publications page, where you can order either the Revit MEP 2010 Fundamentals or Advanced Books. The Advanced book purchase price is $75.00 for single copy. Site license is also available.

thanks - David B.

Thursday, November 5, 2009

Found some cool stuff...two good blogs on Revit and IPD, and more...

Gregory Arkin from CADD Centers of Florida has a nice little article on Revit history I found while doing some research for a meeting today:

http://bimboom.blogspot.com/2007/02/revit-history_11.html

He also had a link to the Tony Isenhoff's BIM and IPD blog, which has a link to the Penn State BIM Execution Planning Guide...very interesting reading, nicely written - thanks to both of these guys for these informative posts!

Tony Isenhoff's Blog:
http://bimandipd.blogspot.com/2009/10/bim-execution-planning-guide-developed.html

Penn State BIM Execution Planning Guide:

http://www.engr.psu.edu/ae/cic/bimex/index.aspx

Happy Reading!

Tuesday, October 27, 2009

The Revit MEP Advanced Book...For Sale Now!!!

Now that the final proofs are complete, and the datasets reviewed and testing, we're ready to start selling this book. If you're interested in purchasing this training manual, you can email me at dbutts@advsolinc.com, or call 877-438-2741 beginning Friday, Oct, 30th. The book will also be available for purchase on our website. A site license version will also be available, so if you're with a university, college or other training center, contact Scott Wolslager at swolsalger@advsolinc.com.

Now, on to more adventures....

thanks - David B.

Monday, October 19, 2009

Right Reading text in electrical families

Finally got a chance to test this out...if you don't like the fact that text rotates with the receptables in Revit MEP, do this...


  1. Open the duplex annotation family. Save it under a new name.
  2. Select the annotation symbol - open the family, and save it under a new name.
  3. Under Family Category and Parameters, make sure that Keep Text Readable is checked, and uncheck Rotate with component. Select OK.
  4. Save the annotation family, and then load it into the duplex receptable family.
  5. Save the duplex receptacle family, and then load it into a project.
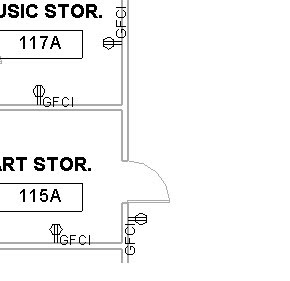
Place a couple of examples - it should look more like this:


The text will read flat for horizontal surfaces and vertical for vertical surfaces, but all will be consistent, instead of just rotated around the symbol. Try using the rotate with family option under Categories and Parameters along with the keep text readable - when I did this, I got the same results, as long as the kep right reading option is checked.

 thanks - David B.

Brilliant Article on BIM

Came across this while looking for information on 64 bit performance in Revit...it's an artical from DPR construction, Transcending the BIM Hype: How to Make Sense and Dollars from Building Information Modeling:

http://www.aecbytes.com/viewpoint/2009/issue_48.html

The article is written by Eric Lamb, Dean Reed and Atul Khanzode of DPR Construction, Inc.

Even though this is a Bentley sponsored site, it speaks volumes as to the importance of setting the correct expectations of BIM.

Very well written - nice work guys!!!

thanks - David B.

Troubleshooting Startup Delays

Ryan Duell added a post to the Revit Clinic site on troubleshooting slow startup performance issues in Revit. I'm sure it will apply to all versions, so check this link out:

http://revitclinic.typepad.com/my_weblog/2009/10/troubleshooting-startup-delays.html

Thanks Ryan, for adding this post!

thanks - David B.

PIMM...in a Design World

Working on something new...everyone's heard of BIM (building information modeling), but I'm thinking more along the lines of PIMM...Process Information Modeling and Management). It's the case of where a building is really more of a part of process than an occupied structure. The idea is that you address a manufacturing process, whether it's treating wastewater or building cars, that the structure and components within become a part of a process from beginning to end for design, and then recycled for life cycle management.

To learn what this meant to different people, I started with PIM and found personal information management (makes sense), protocol independent multicast (now that's a mouthful) and Pakistan Intitute of Management among other things...so I decided to make sure both modeling and management are included in this paradigm.

Since we're really taking about not just the creation of the model but the management of the facility, I settled with PIMM...so who's interested in starting a new paradigm?

Remember, PIMM - you heard it here first...more to come on this one soon.

thanks - dab

The Revit MEP Advanced Book...Finally...

We're wrapping up final editing of the Revit MEP 2010 Advanced book. Chapters include an explanantion of the family editor and family types for MEP, exercises for creating non-hosted and hosted families, using third party content to create families, and a new section on customizing templates and some of the default data files. Look for an announcement at http://www.advsolinc.com/ in the coming days, and we'll be getting this class on the calender starting in November. Even if you're still on 2009, the process is still the same, so if you're trying to move beyond the basics in Revit MEP, this is a great class to take - and it's only one day!

talk to you soon - David B.

Tuesday, October 13, 2009

Ceiling Grids and Engineers...oh my...!

Kudos to my buddy Bruce Johnson at William Tao for coming up with the issue and making me try it out...

Traditionally, the architect defines a ceiling grid in a project. The problem is that it isn't always correct in terms of layout so that the lighting works, so the engineer wants to create the grids themselves.

Enter Revit MEP 2010 - From the Architect tab, choose Ceiling, and then choose the Sketch Ceiling option. A new tab will open up and allow the engineer to create the boundary for the grid. If drawing lines, make sure you're using the chain option to tie them all together (I used rectangular for the boundary for proof of concept). Be careful with some of the snaps, as it may leave you with a open boundary error - if this happens, turn off the snaps and use the listening dimensions to drawing the sketch with the correct dimensions. Once the boundary is drawn, go to Ceiling Properties and check the grid type you want. Choose Finish Sketch to complete the command.

You can lock to boundaries to wall faces if needed, but if any of these constraints don't work you can use the good old fashioned manual method...

And you CONSTRAIN THE LIGHTS TO YOUR GRID...which means when the grid moves laterally, the lights will move as well.

Try it out - let me know what you think!

Thanks, Bruce!!!!

later - dab

Thursday, October 8, 2009

Filters tip for Piping

Tried a few different ways to make sure ALL components on a piping layout have the same color, etc, but the best way we've found to do it so far was to use the System Name to control the filter. In our book, we have the user that's laying out plumbing pipe include the text DCW, DHW, SGW, SBW as abbreviations in the system name with a space or dash behind each abbreviation - that way, the contains option can be used. What this means is that you can't use pipe unless it's assigned to a system - which for the most part, it should be anyway. To make sure that pipe runs going out of the building to a water source or waste connection work correctly is that you put a connector as the top or bottom end of these runs - that way the system includes both the target and source, creating the closed system.

Try it out and let me know what you think...

later - David B.

Thursday, October 1, 2009

Line that Duct tag up...

Found this little nugget while working on the advanced book - to get a duct tag to align with a duct object, open a duct tag. Pick Family Categories and Parameters - there's an option that allows the tag to rotate with component. I'm sure this will follow the direction the duct is drawn in, but it may save a few steps when adding duct tags.

Now if I can just figure out how to associate an air terminal's offset elevation with a label in a tag...and make it automatic...joy...

later - dab

Revit MEP 2010 Web Update 2 is Available

Also available are updates for all Revit Products - for Revit MEP, go to this link:

http://usa.autodesk.com/adsk/servlet/item?siteID=123112&id=12899931

This update includes Update #1 if you didn't get it installed, but once it's been added the only way to remove is to uninstall Revit. Also, you must have administrator privileges to install the update.

later - dab

AutoCAD MEP 2010 Update 1 is Available

Autodesk has release AutoCAD MEP 2010 Update 1 (and AutoCAD Architecture 2010 Update 1 as well) - for the MEP update, go to this link:

http://usa.autodesk.com/adsk/servlet/ps/dl/item?siteID=123112&id=13868521&linkID=8396518

later - dab

Type Parameters Post by Martin Schmid

Checking on the Autodesk Inside the Typepad blog, Martin wrote up a nice little explanation about Type parameters with electrical components - check it out, it will help with schedules -

http://inside-the-system.typepad.com/my_weblog/2009/09/the-case-for-type-parameters.html

later - dab

Nested Annotations and Electrical Devices...

Still working on the best ways to handle annotations in electrical fixtures - the maintain annotation orientation switch only controls that one symbol...hadn't quite figured out how to get the text to stay right reading...watch for a new posted coming soon...

In the meantime, there's a quick way to add labels to a tag without having to add additional label elements in a tag. Open an existing tag and then save a copy of it. Select the label, and then choose Edit Label. From the Edit Label dialog, select the parameter you want to add to the tag. By default they're placed sequentially, so the new addition (which will show up in order in th dialog) will be at the end of the list. Select OK, and then use the grips to stretch the label width - if you want the labels stacked, make the width shorter - if you want them in a single line, make it wider.

Add separate label elements if you want to nest several types within a tag, then use the visibilty controls to turn the labels on and off as needed.

later - dab

Monday, September 14, 2009

Where in the World??


I've been using Sitemap to track data about site hits, etc. Interesting how it shows who and where people connect to your blog - cool stuff, check it out at http://www.sitemap.com/


later - dab


Friday, September 4, 2009

Pipe sizing in Revit MEP

Here's another post from the guys at Autodesk on how Revit MEP sizes hydronic piping - check it out!!!

http://inside-the-system.typepad.com/files/mep_hydronic_piping.pdf

thanks - David B.

Do you have an Engineering Toolbox?

If I need to check up on engineering standards, a few years back I found a site that does a really good job of explaining standards and design criteria - it's a place where you can quickly get explanations of a variety of design criteria for HVAC, piping, etc., as well as links to other sites (such as ASME, ASTM, etc.). - check it out!

http://www.engineeringtoolbox.com/

It's probably one of the most helpful sites I've used in a while///

thanks - David B.

Revit MEP 2010 Fundamentals Book is HERE!!!

We've wrapped up the editing, dotted the i's and crossed the t's - so for the first time our Revit MEP 2010 Fundamentals book that we use for our classes is now available to the general public. You can purchase the book online at the following link:

http://www.advancedsolutionsonline.com/book_RevitMEPEssentials.aspx

There are single printed versions available, as well as a digital site license that allows training centers to print any portions of the book as needed for their classes. This book includes an Revit Fundamentals section that introduces the engineer to Revit itself, then moves into a section on setting up a project the right way. After the project is defined, a chapter is dedicated to using Revit for analysis, and then goes through chapters for HVAC, electrical, plumbing, piping and fire protection designers. The books comes back to all users in the last chapters, where collaboration, interference detection and annotation tools are covered.

The Revit MEP Advanced Book, which will cover family editing and customization will be out sometime in mid-October. If you're interesting in getting on a mailing list about the books, send me an email to dbutts@advsolinc.com

Thanks - David B.

Friday, August 28, 2009

Why go BIM from a State Government Perspective

Whether we like it or not, technology is driving major changes in the design industry. The good news is that there are a wide variety of new ways to increase efficiency in the design process on the side of the architect and engineer. The bad news is that many of the receivers of these services still reside in the chalk-on-a-rock stage. It's amazing to me how many entities - which are so driven by the call to reduce our impact on the environment - still rely on the very technology they want to legislate out of existence. It's one thing for a federal/state/local government entity to pass laws mandating reductions in emissions, forcing the recycling of sustainable materials - but it's another thing for these same industries to walk away from the paper copy.

Which is why it's so important for government entities - for example, our very own State Construction Office, which manages projects for state-owned buildings in addition to maintaining these facilities, to adopt a plan to move away from that deliverable. And this is where the fundamental change to BIM needs to occur. No matter how much we improve this process on the design side, until these entities are willing to devise standards that allow for BIM applications from any manufacturer to be the standard deliverable, we can't move completely to a whole-life cycle of the building. And since our state is the largest land/building owner, it's a shame these standards haven't already been addressed.

SO how do you do it?

The first step is address the legal issue of shared electronic documentation. I've heard from so many designers that their primary concern is the fact they can give a file to an owner or agency, and there be no control over any changes that may be made by that entity. This is pretty simple to resolve - set the timeline as the controlling factor, and use technology such as file locking and digital signatures to assure authenticity - the electronic form of a seal. The seal itself can become an electronic entity that becomes disengaged once the file is edited or saved by the receiving party, so it becomes quickly documented that the file has been altered.

Once the legal aspect is addressed (IMHO, fire all the lawyers - that'll take care of it), the standard for deliverable needs to be worked out so that the brand of software used is open to the point that it is a BIM deliverable. The scope of work should state continuity of applications - if they can't share data via IFC, then the entire product should be on one platform - i.e. Revit Architecture, Structure and MEP should be used as the deliverable file. Autodesk still has some work to do in this arena, but don't think there isn't some work to be done on the Bentley/Graphisoft side as well - we still hear of translation issues between all three applications.

Regulatory agencies also should NOT be the receiver of the BIM file - it should be the owner, contractor and designer that is sharing this file. But the agencies must specify this standard, so the government entity has a guideline to follow. We'll talk about this in the next post on electronic deliverables...

But WHY should this become the practice? For starters, the model itself takes on a longer life term than the paper document. Requiring models promotes use of more efficient energy/LEED/Sustainability concepts and automates the process. With applications such as Ecotect, Virtual Environment, Green Building Studio and others refining the ability to work with these models, and quickly generate design alternatives, life cycle costs, etc., there's no reason these agencies should be continuing to accept applications that can't work directly with the building model. Read my lips - 2D CAD docs are dead in the water, and have outlived their time.

The roundtrip of as-built models can reduce design cycle time and cut down on expensive on-site time to verify as builts - while it may add some time to create a more accurate model in the forefront (no, you can't use TYP. anymore - see the previous post), it can save a great deal of time for this activity - provided the tool contains all of the features necessary to represent the major components of the building.

SIDE THOUGHT - part of the standards must specify the level of modeled detail - you're not going to drawing every nut and bolt, every stud or every wire - but you are going to provide major equipment, large size connecting geometry that has less flexibility than something like a wire or cable.

Instead of having staff spend large amounts of time maintaining paper docs and 2D files with little to no common standards (all based on each design firms process) switch to the GBXML model, IFC Model, or direct Revit model delivery - have state staff maintain one central model instead of hundreds of drawings and paper documentation. UNC campuses alone have hundreds of thousands of drawings dating back so many years, and taking up so much valuable floor space that could be used for other purposes. And accuracy? Take a guess...knowing how many different design firms that have worked on government buildings, should give you a good idea of how many different approaches have been used - BIM forces more consistency.


On the facilities management side, BIM requires a different type of worker - a combination of real-world design experience and next generation understand of computer technology. the user doesn't need to be at either end of the spectrum, but a non-designing FM "documenter" (to quote my redneck heritage) should have enough design sense not to stick a screwdriver in a live light switch. They have to have a fundamental understanding of construction and design, but should not have to be at the registered level.

So where do we go from here? Depends - on how well you know your congressman or state agency rep - are they really interesting in reducing their own impact on the environment, or reducing the costs of government? Or are they there for some other purpose other than serving the people they represent...

Any comments?

Have a great Labor day weekend - enjoy the fruits of your work by taking a day out of petty cash and going fishing...it's on me!

later - David B.

Thursday, August 27, 2009

IES VE Pro 6.0 - Check it out...

got a look at the new IES VE-Pro 6.0, VE-Toolkits and VE-Ware...the only thing I can say was WOW...check it out for yourself:

http://www.iesve.com/NewsEventsNAmerica/Display-Story/?newsid=6532

I've ordered my copy, will put some posts up here soon on both Ecotect and IE VE-Pro in the coming weeks.

thanks - David B.

Tuesday, August 25, 2009

More Content from CAD Details

These guys are a third party aggregator and developer that have some pretty good content for Revit, Sketchup and AutoCAD - check it out and let me know what you think -

http://www.caddetails.com/

thanks - David B.

Thursday, August 20, 2009

Return of the MEP Blog from Autodesk

Just heard from my old buddy Dave Pothier at Autodesk (he's one of the first ADSK guys I met, but I'm still the better looking one)...they've updated and resurrected Kyle Barnhardt's Inside the Typepad blog and are updating it with new content for both of the MEP products - check it out when you get a chance, there's going to be some really good stuff here.

The link is under the Helpful Links...section on the right...right down there...that's it...

Thanks, Dave!

later - David B.

Wednesday, August 19, 2009

My Wish List for Revit MEP...

Having messed around with this for a while, it's time to come up with the list...Autodesk is making progress with the app, but there are still things that really need to be addressed. Most of this stuff can be worked around, but if I was the product manager, this is what I would focus on...

1. Conduit, Cable Tray, Bus Duct, Flat Oval Duct...'nuff said.
2. Connectivity into linked files - ultimately, there's going to come a day when a project simply has to be broken up. The ability to read a connector's info through a linked file (without have to place a dumb connector in the current project) is vital. We've got that for the most part in ACAD MEP - at least in there we can pick up on pipe, duct, cable tray and conduit connectors...
3. Which leads to point 3 - ACAD MEP SNAPS!!! create connection point snaps -add this functionality to Revit- it works great in ACAD MEP and really helps clarify what the connection point is..
4. Make the undefined connector type (the general system) usable as a source equipment connection. I had a bizarre conversation with someone that tried to tell me that pumps are only considered inline accessories. Tell that to the base mounted pump. It can't be placed like an inline pump the way the connectors are defined - so autolayout freaks out when you try to treat it as any other device in a system. And in many cases, the pump is the primary source of fluid flow (see sprinkler system) - the valve is already treated as an inline component and behaves correctly. Our workaround has been to make a copy of the pump family, and then set the connector to a specific system, such as fire protection wet, hydronic supply, etc...
5. Which leads to point 5 - open up the systems to allow user-added options. There are so many subsystems under hydronic piping, "other", supply, return, exhaust...there has to be a better way to do it. If you can't open it up, then allow for a subsystem option that lets the user control the sizing and design parameters - not every supply duct will be sized the same way, and a subsystem would make it easier to control this.
6. Schematic Symbol improvements - try making a custom valve in Revit MEP, or editing an existing one...lots of fun here with no documentation. We're working on it, but getting some input somewhere from Autodesk would be really helpful. And having a riser/schematic diagram tool would be nice, but for now we're using the tools in ACAD MEP and importing the DWG into the project.
7. Excel links - bidirectional and in the program, not having to go through a DXF or DWG...'nuff said. Not every engineer is gung ho about using SQL, VBA, OBDC (or is that ODBC)....know thine audience...and keep it simple.
8. Panel schedule editing tools....that work easily...graphical interface perhaps? My ears get burned on this one by the EE's every day for both MEP applications - nobody does them the same way, every state has its own requirements for how these should look and feel, and what information goes in them - so we've got to be able to easily edit them. (side note for schedules - allow for a predetermined width and height in the formatting, instead of asking the user to drag the columns on every project).
9. I compliment the pace in which Autodesk is getting content together for the product - much faster than ACAD MEP...now make sure you have the parts such as toilet carriers, etc. that the plumbing designer never used to show - but beats us up about every day. If they're going to have to model it, then by God, let's model it right...
10. Copy/Monitor - wow, this one's getting hammered, but it's got to work right or be replaced. Either make constraints work through a linked file (such as using a placement constraint to get a light to stay aligned horizontally with a ceiling grid) or get the rest of the components to be copy monitored through a linked file (without flipping it around, changing alignments, breaking cleanups) - including ceiling grids.
11. Get the piping guys from ACAD MEP to come on over and help...it's vastly better in 2010 but still needs some work - these guys have got it nailed in ACAD MEP 2010 - build off of what they know needs to happen...and make it happen. It needs the right connectors (separate from the pipe and fittings), insulation, etc. but it doesn't need to be at the gasket/bolt/weld level - you're getting warmer... Single line and double line concurrently in plan display at the same time is a must.

I'm not all complaint - analysis and HVAC in the program are working great and just need a few tweaks here and there (did I mention oval duct?). Scheduling and coordination have always been hallmarks, I'd add soft interference and clearance detection if at all possible. Lighting fixtures rock in this release, and the realtime data analysis is always sweet...and now that I'm used to it, the ribbon is very cool, the interface looks much more professional than previous releases. Electrical is definitely getting better, but I'd love to see a right-reading setting for embedded annotations (as well as a separate grip for location options - again, AKA ACAD MEP devices).

If you have some things you'd like to see, comment on the post - I'd love to hear from others as well...

The workarounds? for now you'll need to attend this year's class at AU I'm doing to get them all in one document (Revit MEP: Powerful Tips and Tricks...this is my shameless plug) - see you there!


David B.

How Revit MEP calculates Wire Lengths

I'm not sure who wrote this (if someone knows. let me know and I'll update this post), but Emy in our Columbus office found this - it's a great explanation of how the wire length is determined and used in calcluating voltage drop.

Check it out!!!

http://sites.google.com/site/autodeskrevitmep/Home/frequentlyaskedquestions/wire-length-calculations

thanks - David B.

Tuesday, August 18, 2009

Revit MEP 2010 - Copying Hosted Elements, and continuing on from TYP...

After reading my own post (yes I do this once in a while), I got to thinking about the whole hosted element thing...and had a few more thoughts...scary, ain't it?

Now that we've had a chance to start teaching the 2010 release, a few things are coming out of the engineers. A common thread is related to the AutoCAD way of doing things. When a client wants the RVT file as a deliverable, it usually will mean the engineer will have to place more obejcts in a project. Since I was already thinking about typical layouts, I asked the firm I was teaching how they did it - and all of their "common layout" jobs meant they used typical to layout common rooms, and did not place receptacles, lights, etc. in every room...but you can't get away with that when the deliverable is the model file.


So, a couple of points came out of this -first, you CAN copy hosted elements - for example, select all of the receptacles in a room (the OOTB ones are hosted elements), and then use the copy command. Make sure you select a common snap point (such as endpoint or intersection) that appears in every room. If the rooms aren't 100% identical, that's not that big of a deal - you simply select an object, then use the modify tools to re-host it to a new face. What doesn't work is putting hosted elements into a group - once in a group, they can't properly place into other locations in a project. We've also toyed around with just placing a connector per the last post, but I think the main point we need to make sure that all Revit MEP users understand is that you don't do it or quote it the same way you did an AutoCAD job. Be prepared to allow for more time to get the common objects placed in every room - and once you get proficient, you'll be buying that time back with time savings made in other areas - like using the schedules, autolayouts for duct, pipe, wire, etc.,...

And there's still more to follow...

Monday, August 3, 2009

My plan is TYP...but these are just TIPS...for Revit MEP 2010

For those of you that have to use Revit MEP, but have been using AutoCAD forever, and like how it works...

- Revit likes hosted families, but putting them into a group and copying them around a building can produce some rather interesting results. One workaround (from Emy in our Columbus office) is to create your common layouts in a few rooms (say you have 4 typical dorm rooms, which all have the same layout). You can either use non-hosted families (but then lose the coordination value of having hosted items move when the architect changes the plan - which we all know never happens), or you can place a connector to represent the objects in the room. Revit MEP has all kinds of connectors for HVAC, electrical and plumbing. You'll lose the benefit of being coordinated, but if the architect and/or owner isn't looking for the RVT file, you can still create an object that can have load assigned to it, and assign these items to systems.

- Another tip for 2010 is to make sure everything in the project is assigned to some form of a system - whether you're routing connecting geometry through it or not. Not everything needs to be routed from an automatic layout, either. Jonathan from the Indy office noted that the piping layout behaves better when fewer devices are connected in a system - so rather than connecting everything at the beginning, go ahead and work out one side of a chase, rather than expecting Revit to properly connected when both sides are part of an original systems. With back-to-back fixtures, the program behaves much better when you route one side, then use the grips to convert a tee to a cross - adding the pipe to the fixtures on the other side after the fact. You can always come back and add fixtures to a system later, but don't leave them unassigned.

- And another one for piping - when working with sloped pipe, work in a section view - draw to a point in plan, then switch in section to show the sloped pipe. This works especially well in tight areas. Jonathan came up with a very simple exercise in this year's book for adding the P-trap to a plumbing fixture - do it all in a section, then copy it around as needed.

- Working sections also is the way to top or bottom justify duct - I've been through the new justification tool, and gotten some pretty wild layouts. Draw the duct by centerline, then add a section view. Pick the duct run using the tab key, and then re-justify it in the section view -it works really well this way.

More to come, stay tuned....

thanks - David B.

Revit MEP 2010 classes have started at ASI

We've finished the books for the newly titled Fundamentals class, including 4 to 4 1/2 days of training. The courses follow a learning path that should guide the user through what they need to know get up to speed as quickly as possible in 2010. For a table of contents, send me an email at dbutts@advsolinc.com. Class registrations are now online at www.advsolinc.com.

The Advanced version for Revit MEP 2010 is still in the works, and we're shooting for a September time frame. The new book is looking like it's going to be 2 days, with a lot more content on family editing and template/project customization (and possibly a few things that nobody else has written manuals for). Keep your eyes open - if you want these books to be available for purchase or for site license, send me an email and let me know, we'll add you to the list.

Thanks to Emy McGann, Jonanthan Weinhold, Paul Sills, Doug Greenwell and Kristen Fierro for contributing to this year's book...and to Norb and the executive team for putting up with us while we wrote it!

Thanks - David B.

AU Classes for 2009

Here's the class list for me for AU 2009 -

Taking AutoCAD® Architecture to the Next Level - 90-Minute Class, Intermediate

AutoCAD® MEP 2010 Advanced Tips and Tricks - 90-Minute Lab, Power User

Revit MEP 2010 - Powerful Tips and Tricks - 90-Minute Class, All Levels

Working in a Dual CAD Program Environment (Revit MEP and AutoCAD MEP) - 90-Minute Class, Intermediate

Blue RIbbon Editing for AutoCAD MEP and Integrated Project Delivery - 90-Minute Lab,
Power User

All of the course descriptions are available online during registration - sign up early and sign up often, got a lot of new material this year!

thanks - David B.

Monday, May 18, 2009

The History of the World - Part ACAD

While checking up on some ADSK news, I found Shaan Hurley's Autodesk history page - if you an aficionado of this stuff, check out this link:

http://autodesk.blogs.com/between_the_lines/autocad-release-history.html

Thanks, Shaan - Great Stuff!!!

David B.

Monday, April 20, 2009

Call for Proposals for AU 2009!!

AU Call for Proposals -

As you all know, Autodesk University (AU) is the premier annual event for Autodesk users from around world. Each year, this conference and exhibition offers outstanding training, exhibits, and networking opportunities that help design professionals advance their careers and gain a competitive advantage.

Attendees look to Autodesk University for Autodesk and partner solutions that can help their organizations achieve success in today's fast-changing industries. Each year, AU offers an excellent curriculum presented by outstanding speakers who are leaders in their industries.
AU 2009 will be held from December 1-4 at the Mandalay Bay Hotel in Las Vegas, NV—one of the world's finest meeting and convention facilities.

To be considered as an AU 2009 speaker, we invite you to submit a proposal online. We welcome multiple submissions from experienced presenters and also offer several different class types, such as classes, lectures, hands-on labs, and discussion panels, to suit whatever your speaking style is. Also, new this year is the addition of a 60-minute Virtual session.

We’re definitely in need of intermediate and advanced classes that speak to traditional course offerings for general, architectural, MEP, structural, construction, civil design and geospatial, but we’re also very interested in knowing how professionals like you are successfully using Autodesk tools collectively to solve critical challenges in the following industries:

Building – How are you using a model based design and construction approach, with BIM at the core, to capture opportunities in retrofit and renovation, and to meet building energy and sustainable design requirements? How is the Autodesk BIM portfolio enabling you to improve your existing construction management process and streamline communication with stakeholders ensuring projects stay within budget and time schedules?

Civil Engineering – How are you using the Autodesk family of products for civil to address key issues within transportation, environmental and land development projects such as; road and intersection design, sustainable design, infrastructure renewal, and bridge design?

Utility/Telco – How are you using the Autodesk family of products to address key issues such as smart grids and sustainable design, aging infrastructure renewal, substation design, plant design, and network design and management, in the electric & gas, water / wastewater, and telco industry segments?

Process and Power - How are you using Autodesk products to deliver plant design and upgrade projects, meet environmental regulations and increase plant efficiency?

The deadline for submissions is April 30th, 2009, so there’s still time to join us in making this year’s AU the best ever!

Click here to submit your proposal.

Thanks to Armundo Darling from Autodesk for this reminder - if you've never taught at AU, but have solid experience and a lot to offer, then submit your proposal - it'll definitely be worth it!!

thanks - David B.

Wednesday, April 1, 2009

New Virtual Environment Plug-in coming

IES has announced their new plug in will be shipping in April. The new interface requires a ribbon instead of toolbars:


As more information is released, I'll post it here - but first glance looks really cool...

tks - dab

Wednesday, March 11, 2009

Revit MEP 2010 - second review...

Okay, had a chance to do a little more looking -

Emy pointed out the new space styles and features - much better, with more control over the space style and better data input should result in a more accurate analysis of the model. Better reports, too. And the more I use the ribbon, the more I like it - it just needs to be better organized.

The pipe library is finally starting to take a more realistic shape - better organization, but still needs more content - i.e. PVC only has socket type, lots of iron but no copper tube, so use the generic type. It'll work fine for now.

And it's amazing how little things can make such a big difference. In my class today on 2009, I was showing the round to rectangular transition - which in the current release looks like a reducer - but in 2010 it looks correct. The client will be happy - and Autodesk needs to include updates like this in a list when they present betas for review, instead of just putting out the highlights. We don't need a big powerpoint or fancy document - just leave us a trail of breadcrumbs to follow, we'll be good...

I'm hoping to actually get some documents written on customizing parametrics in both ACAD MEP and Revit MEP this year, already started on one as part of project for Autodesk. Watch this blog for updates...

More to follow - thanks!

David B.

Thursday, March 5, 2009

More content from Manufacturers...

In case you haven't heard (and you're a Revit MEP user), a couple of manufacturers have gotten on the bus with their own content. One is McQuay (http://www.mcquay.com/McQuay/BIM/Revit-BIMFiles) for air side components. Watch the shared parameters file - while it's nice they included this, be careful that you don't overwrite your own parameters. Look at theirs first if you haven't customized this. I don't know about an Autodesk endorsement for their products, but they're still worthy of checking out and using where possible.

Titus has a plug in that goes directly into Revit:
http://www.titus-hvac.com/software/Revit.asp

A couple of our TE's have been checking this out, I don't think they're gotten everything working 100% with it, but as with McQuay it bears inspecting.

Trane has had some parts up for while:
http://www.trane.com/Commercial/AboutTrane/ContactUs/SalesOffices/Default.aspx?cso=120

Links are in the lower right corner of the page.


It'll be interesting to see what other manufacturers get on the bus this way - these guys are already getting a leg up on the competition.

Happy downloading - David B.

An update - David from McQuay responds about the endorsement part - read on, it's a helpful explanation - thanks - David B.

2010 Releases are coming...My Revit MEP and AutoCAD MEP Preview...

I've had a chance to spend a little time in both applications now, and the programs are definitely showing signs of improvement. One of my pet peeves for the past few years has been the inconsistency of the interface, which a) doesn't follow the design process and put tools in logical places to follow that process and b) was in serious need of updating to reflect how the tools and the industry works. Medium to high marks are what I would offer in regards to the ribbon based interface of both applications. There are actually consistencies between the two interfaces to some degree (although naming the tabs home and insert make absolutely no sense to me), so a user that has to work in both applications, it should be easier to find tools and use them.

Biggest issue with AutoCAD MEP is the remaining palettes, which have gone largely unchanged for several releases and need to be scrapped for a simpler system. I still get new ACAD MEP users complaining about limited systems, tools etc. since the palettes only contain specific examples, when in reality there's a lot more to the program. The additional overhead of having multiple workspaces (one for each main area and discipline) needs to be cut completely out - Revit MEP has the right idea on this by having all of the disciplines under the home(?) tab. AutoCAD MEP should go the same way, and I'm working on a CUI that reflects that layout.

One of my high marks to the interface is also going take away one of my favorite in-class expressions (you want to change something, right mouse click). The interface changes to include a modification ribbon automatically - hence only a one click feature (look up - it's a bird,it's a plane - wait, it's a modification ribbon!!!)Pick an element or object and check it out - very cool!

There is some duplication of tools in the interface, such as having multiple locations to add annotation objects. How about this - a equipment tab, following by the connecting geometry tab for duct/pipe (and cable tray/conduit for ACAD MEP users), and then an annotation tab. This type of interface would follow the benchmarks of design and help the user use the tool to follow how the MEP portion a project is built.

I'd still love to see the interface tools on Revit MEP open up a little bit - I'm still toying with the macro tools and seeing what the program will do, so if I come up with something interesting I'll post it here.

One of the biggest challenges coming up is the ability of these applications to interface with other tools. IFC still needs work - MEP objects from both applications will have to be able to be exported sometime soon, as GSA is writing and updating its submittal standards to make the IFC file a deliverable. It's an area that Autodesk needs to invest in. The gbXML export also will be a big factor as more applications come on the market to perform various forms of analysis (now that we're all hyped up on green stuff). The third party applications that have had their heads stuck in the sand need to learn how to get more out of these exported files and learn how to communicate their data back to the model. A few such as IES Virtual Environment are doing it and doing it well, so it's time for them to get on the bus.

On the Revit MEP side - man, do we need oval duct, cable tray and conduit - any clue when these will be available? Adding pipe accessories seems to be more stable, but deleting inline components still doesn't automatically mend the pipe line (as in ACAD MEP). Hopefully some of these long-term needs will get met - we've got the interface, now get these features into the program.

My world still says that if the architect is in AutoCAD/2D Cad/AutoCAD Architecture, stick with ACAD MEP. If you're doing large industrial type projects (including water/waste water), stick on the ACAD Arch/MEP model (regardless of how Autodesk wants to position it lately), it's still Building Information Modeling and works extremely well. If the architect is on Revit Arch, it depends on the type of building as to whether or not I'm going to use Revit MEP versus AutoCAD MEP, but in most examples, the Revit to Revit model is the way to go.

Forward thinking firms that employ designers as the user need to go the Revit model, as long as the buildings they're designing are not process intensive. Once Autodesk can get the missing features in the application, and work out some kinks with Revit MEP, it'll be easier for these process and system intensive design firms to take a closer look at Revit MEP. Having both in one suite and giving the client the option to choose the best tool for the building type is absolutely the best way to go.

As I get some additional time before the product launch and get to look at other new features, I'll post a few previews here...stay tuned...

later - David B.

Wednesday, January 28, 2009

Another IFC Post

When exporting a Revit Architecture model using IFC 2x2 to AutoCAD MEP, the parameters come across pretty well, with a minor hiccup. Revit parameters can includes spaces - but ACAD MEP property set definitions can't read an item with spaces, so with every update, you need to open the newly exported file in ACAD MEP. Rename the Pset_Revit_Identity Data property set definition to Pset_Revit_IdentityData . Next, you can edit the ACAD Arch block definition used in the mvblock definition's default room tag's name and number attibutes to read this new property set instead of "spaceobjects".

Try it out - I've got a the block edited in a new Schedule Table style drawing if wanted - it's small enough to email, so send an email if you're interested.

thanks - David B.

Modeling Content from ThomasNet

Been tracking these guys for a long time, they continue to add content and 3D model components to their site...check it out!

http://www.thomasnet.com/cadmodels.html?WT.mc_t=upd&WT.mc_n=O_109&channel=email

They've also had several good management and business practice articles lately - good reading if you're trying to keep a positive spin and attitude in today's business climate.

Copy and paste the full link above to your address bar - if that doesn't work, here's the main page:

http://www.thomasnet.com/


Have a great day - David B.

Wednesday, January 21, 2009

AutoCAD MEP, Revit and IFC - be careful...

Found something out the hard way the other day...apparently IFC exports using version 2x3 will not import into ACAD MEP at all - so if you are working with an architect using Revit or any other application that you can get an IFC file from, make sure you use IFC 2x2 - tried it out and it works fine, created a project correctly and converted into AutoCAD Architecture walls, and other objects just fine.

I've got this as an open case with Autodesk, so if it gets resolved I'll post it here.

later - David B.