We’re all guilty of sticking to old habits, but with the advance of technology in our design platforms, some things you might have done in the past are no longer necessary – and can cause more problems than they save. This series of tech tips are here to help you understand the differences in working in old environments such as our old Windows network, and new locations such as loud-based document management systems, including BIM Collaborate Pro, ProjectWise and Sharepoint.
Understanding How Autodesk Programs Use Temporary Files and Space
Microsoft Windows was first released in 1985, as a first
“graphical interface” for the “disk operating system”, better known as MS-DOS.
Many of the foundational aspects of DOS remain, such as a computer’s need to
have one program be the focus of the computer at the time. The system has
evolved to allow other applications to remain running and active, which created
the need for “temporary files” to stay open in the background.
Autodesk programs such as AutoCAD and Revit have used background
files for a variety of purposes:
- AutoCAD files previously used their own file locking files to prevent more than one user from accessing a file at a time. While the early vestiges of DOS incorporated “restricted access” to files, it was not until AutoCAD 2000 that Windows took over the file locking service through the operating system. The previous DWL file simply tells the system who has the file open. The files are intended to be deleted every time the program is closed…until it crashes.
- AutoCAD also has a series of backup files that are created, which use .BAK, .AC$, and .sv$ extensions. While there should always be one backup file (.BAK), the automatic save (.sv$) and temporary (.ac$) files should be deleted when AutoCAD is closed…until it crashes. These autosave files are typically stored in a C:\users\username\appdata\local\temp folder.
- Vertical toolsets and Civil 3D create even more temporary files that are associated with functions of the features in the program – such as other types of temporary files that could be stored in your local c:\temp folder and project folders.
- Revit has its own infrastructure of temporary and access files since the project model can allow multiple users to safely access one file (unlike AutoCAD). If the model is based on BIM 360 (BIM Collaborate Pro) or Autodesk Docs, then “cached” versions are copied locally so the user is not dependent on accessing the cloud 100% of the time. Caching also improves file performance by storing and updating the local copies via the Desktop Connector application.
- In addition to the Autodesk programs, other applications can add variety of temporary files that can quickly fill up a hard drive and cause out of memory errors.
How do you know when you need to clean up? It’s easy – get in the habit of doing it on a regular basis to avoid issues in the first place. Do this at least every one to two weeks. But if you start to get errors such as files being out of date, not saving, changes disappear, and files take a long time or do not open at all. Quick note - while this covers Windows 10, Windows 11 will have similar locations. I've added a few notes for version specific items.
Let’s look at how to complete these tasks quickly
and easily.
Hard Drive Maintenance
The best way to handle system clean up is to us the Disk
Cleanup tools that come with Windows. This tool takes care of your hard
drive and makes sure the overall system is as clean and functional as possible.
To perform a disk cleanup, follow these steps:
Before starting this task, make sure
that you have closed any open applications, saving your work as needed.
Items on the hard drive that are in use may not be able to be deleted or
removed, so always close your applications first.
Open the Windows File Explorer tool. When the program
appears, make sure the address bar and view is set to This PC –
here’s an example that your system should look like:

You’re looking for the main hard drive on your
system. Our computers, for the most part, use one hard drive as the storage
device. You can see this under Devices and Drives – the PC Name and
Drive letter C: are indicated, along with the available free disk space:

An early habit you need to learn is to change or edit
something, place your cursor over the object and click the right mouse button. Context
sensitive menus, based on what you have selected, will appear, and provide
a list of tools and actions you can use on the device you have
selected:

For Windows 11:

Be aware that this menu will appear differently based
on the applications you have installed on the computer. At the bottom of the
list, click Properties, which will always appear there. A new dialog
will appear:

The General tab provides the key information we need,
including the overall capacity of the hard drive in gigabytes,
the used space and free space.
Keep in mind we always want to make sure that we never
go below 20% of the capacity in free
space – so cleanup helps us with this habit. The Disk Cleanup tool
is displayed on the General tab and is the only tool you need to use for this
step. Select Disk Cleanup to continue:

A list of all items you can remove from the system is
displayed. Scroll down the list to review the list, and the bold options
are the key ones to select:
- Downloaded program files
- Temporary Internet Files – to make sure your internet runs efficiently, clean these files often.
- Directx Shader Cache – if you don’t do a lot of rendering, you can delete these files
- Delivery optimization files
- Downloads – this one can go either way – if you are downloading files from other sources, make sure that as soon as you download the file, you move it from your c:\users\username\downloads folder first if you need to keep the files. Don’t hold on to or store files here – in other words, move it or lose it.
- Recycle Bin – files you’ve already deleted
- Temporary Files – this is the main one you want to clean up
- Thumbnails
Cleaning Up Your Cloud - Autodesk Docs/BIM Collaborate Pro
Autodesk introduce cloud-based computing for their products
a few years ago beginning with Buzzsaw, and are now at the Autodesk BIM
Collaborate Pro/Autodesk Docs products for all projects that are primarily based
on their software (including AutoCAD, Revit, Civil 3D, Plant 3D and
more). At different points in the project, it’s important to perform
maintenance on your local system to make sure your system performs at its
maximum potential.
To clean up your Autodesk Docs files, follow these steps.
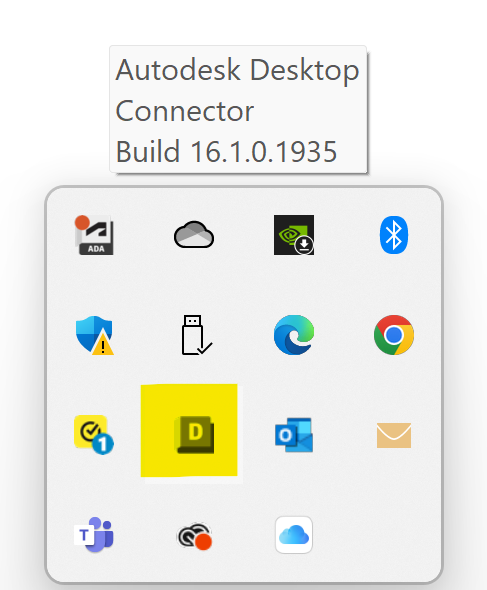
For this first step, you must have the Autodesk Desktop Connector application running, and be signed in to your Autodesk account. You can check this by looking for a white “A” icon in your system tray of the lower right corner of your screen:
If you are not signed in, right click on the icon, and
choose Sign In:

After signing in, from Windows File Explorer, locate the Autodesk Docs shortcut – expand it to show a list of all the projects you are assigned to in you business’s project hub. In this case, the example is showing a training project that we want to make sure is cleaned up and current:

Double click on your project – the Project Files
folder will appear. Right click on the folder to see the maintenance options:

The two primary tools to use are Free Up Space and Sync.
Sync forces the latest version of the files between
your local hard drive and cloud are synchronized – this step should always be
performed prior to using Free Up Space.
Free Up Space will remove the local copies of any
Revit or CAD files in the project folder. This forces Revit and AutoCAD to
download the latest version of the files from the cloud the next time the files
are opened.
A couple of rules about this step – this
tool will only run on folders and files that you have permissions to access and
edit. You can also choose to sync individual files.
Run the Sync command first by selecting that option. A dialog will appear in the lower right corner of the screen, indicating your files are being transferred to the cloud. After the sync has completed, the files in the folders will indicate they are synced with the cloud project files:

Next, right click on the folder and select Free Up Space.

A confirmation dialog will appear:

If you return to the folder, the files will now show as online – this indicates that the local copy has been removed, but when you open the file from Revit or AutoCAD, the latest synced version in the cloud will be downloaded again and become the current local copy.
Advanced File Cleanup for Autodesk Docs
If you are a more advanced user, and you are having other
issues with project files, you can manually clean up the temporary files that
are created with Autodesk docs. Before performing this step, make sure that all
changes have been synced, and all Autodesk design applications are closed.
You will also need to make sure that Windows File Explorer is set to show
hidden files. If you are unsure of any of the steps for performing this
task, do not try it alone – contact Autodesk support for assistance.
Sign out from the Autodesk Desktop Connector. Make
sure ALL programs are closed (except for this File Explorer).
From Windows File Explorer, browse to these locations
(add your username and the version of Revit)
- C:\Users\username\AppData\Local\Autodesk\Revit\Autodesk Revit 202x\CollaborationCache
- C:\Users\username\AppData\Local\Autodesk\Revit\PacCache
- C:\temp (if you are using Windows 11, the temp folders are located in C:\Users\YourUserName\AppData\Local\Temp).
Delete as many of the folders and files as possible –
should any of the files say they cannot be deleted, skip these.
Reboot your system using the SHIFT+Restart option
to force a hard reboot of the system. Be aware that a prompt to Continue to
Windows will appear – you must select this to continue.
Log back into Windows and check the c:\temp location
to see if any additional files can be removed.
Log back into the Autodesk Desktop Connector and
resume use of the applications.
Additional Links and Information
For specific directions from the Autodesk Knowledge Network, check out these links:
Summary
Using these methods will prevent a project from becoming
populated by duplicated and unmanaged versions of the files. Use versioning and
the compare tool to review what’s in the files, the sets to replace your old
archiving process, and transmittals for sharing – you’ll enjoy a well-formed
and managed project.
No comments:
Post a Comment