Showing posts with label @autodesk. Show all posts

Wednesday, November 2, 2022

Understanding Revit Category Uses for Component Families

 There are definitely some things that I love about Revit, that I consider a vast improvement on AutoCAD and 2D drafting. One of my favorites are the use of hard-coded categories instead of user defined layers. This makes standardization on a project much easier, but there’s also a ton of flexibility that can create issues for users. It helps to have a clear understanding of how the categories are to be used and see some changes Autodesk has made to expand the categories.

Every object in a project is divided in object style categories. Model, annotation, analytical model and imported objects represent the four primary object styles that can be edited and defined in a project.

Model objects are for physical representations of real-world objects. These include additional filters by these disciplines:

  •           Architectural
  •           Structural
  •           Electrical
  •           Mechanical
  •           Piping
  •           Infrastructure

 Autodesk has been expanded the default categories that are included, starting with the infrastructure discipline in 2021, then adding temporary structures, medical equipment and vertical circulation in 2022. The current release 2023 added Mechanical Control and Plumbing Equipment to help clarify and isolate these types from their previous categories.

By default, when a component family is defined, you select one of these categories for the overall model. Any solid model or imported object is automatically associated with the primary category, but you can also create sub-categories for the primary object style.

Be aware that not all of these categories are for model components – for example, system components include pipe and duct items as well as their associated insulation and placeholders. Ceilings and walls are also system families that are defined in the template and not as a family-based model component.

Another key item to note – users in the past switched between general model and specialty equipment based on whether the category was able to be “cut” for a section view. Revit 2023 now includes an “Enable cutting in view” option for Specialty Equipment families that eliminate the need to differentiate content based on this requirement.

Here’s a list of all of the primary model object styles (based on Revit 2023):


Each one of the model categories can include a subcategory. One way we use these is to help us refine the visibility of objects within a category. For example, electrical and mechanical equipment cover a wide range of family content:


A common use of a subcategory includes a clearance object, which is used in model coordination to help maintain areas that cannot be encroached per code requirements. Another use is to set the default 3D geometry so they can have different lineweight, color, patterns and materials assigned. By editing the solids in a family and assigning them to this subcategory, you can provide more specific settings for the visibility characteristics of a part and help isolate items in the same category.

Proper Uses and Assignment

Object styles provide multiple features that go beyond just visibility. While you can add sub-categories to expand visibility options, assigning the category also tells Revit about specific behavior a part may include. For example, electrical equipment covers any power distribution device, including power panels, switchboards, transformers and equipment switches. When a part type like this is assigned, Revit will automatically assume that a circuit or power connection is needed. If a connection is not made to the device, it will appear as an open circuit, letting the user know that it is available as needed.

The categories are assigned in the Family Editor under the Family Category and Parameters tool. When selecting different types of content, pay attention to the part type:


In this example, the electrical equipment category specifically references the part types that should be used. Equipment Switch, Panelboard, Switchboard and Transformer settings all include built in electrical data – so if a family is incorrectly defined in this part type, it could lead to Revit indicating an open electrical connection in error, when in reality the category is incorrectly applied.

So how do we select the correct category? To help with this, review this Revit Category Use document  to see recommendations for how we assign these, based on who the model element author (or owner) is, and what types of families would be typically assigned to these categories. In the long run, consistently using these assignments can help you create a cleaner and better organized project.

thanks - DB


Tuesday, November 23, 2021

The Revit Point of Views – Part 3 – The Demise and Rebirth of Digital Delivery

 I’m sorry to announce (but am going to take credit for) the demise of the sheet. It was killed in a train wreck headed to a digital project delivery meeting on the outskirts of town. Also lost in the conflagration was the CAD standard, widely known for enabling the sheet to be a pain in the butt for owners and designers in the AEC community alike, but greatly respected for keeping layers in line. While their careers were developed in good intentions, they became a financial burden on their parents, costing companies time and money figuring out how to make sure the right font is used so it can be read on a rain-soaked sheet of tree debris in the field. It did enable their offspring (the CAD managers) to create and form a career path we didn’t really know we needed but like today’s social media, fall into the trap of believing we couldn’t live without them. Some of us followed that career path like lemmings, but the Church of Holy BIM Stuff came to the rescue a few decades ago.


I had that poster hanging in my room during my formative high school years, and it still makes me laugh…but it’s still a sheet. Long lost in moves, it’s a relic of the past but still a great memory. I'm sure there are a few business owners and government agencies saying this now as they read this article.

After 36 years of dancing with architects, engineers, owners and municipal managers, I propose a life change. The drawing sheet, a long vestige of AEC design documents for more than a century, has become a drag on projects everywhere, causing project teams to spend untold amounts of time focusing on document appearance more than the quality and content of the design itself.

Why have I taken this drastic step and opinion? Because it’s time. My generation is moving on, and it’s time for the next generation to step up and own the foundation we have built to take design and construction to the next level. 

A few years ago, we had a “life-changing” moment that occurred when we replaced our IT leadership that was bound and committed to the technology and tools of the past, with new leadership that would challenge us to do more, better and take risks where we had been unwilling to do so before. Fear of change is real – while change just for the sake of change can be bad, change made to improve workflows, deliverables and overall quality of life and project are always welcome.

Christian Birch, our Senior Engineering Technology Manager, has been a great example of leadership in managing change in an AEC firm. He’s been able to maintain a good sense of IT integrity while salvaging a relationship with our business lines that had been damaged by years of silos and poor communication. In an early meeting our new IT leadership team, when discussing a content and standards management application (“DDesign” for the Gannett Fleming folks) we had been using for decades that lived in our network that was damaged in a cyberattack last year, we were challenged to use the “Five Why’s” to understand why we needed the tool. It was critical for us to look objectively at what we use and understand its role as well as when it’s time to let it go.

The exercise goes like this – in order to pass the smell test, you should be able to get through 5 “why” questions to understand the need for the tool. All of these started with question, “Why do we need DDesign?”...

My responses went like this:

Because it gives us a local storage solution for our standard content

Because it helps us work when the network is offline

Because Norb and I could push the content to a location where the guy who wrote and managed it…damn, he’s gone and left. Anybody else know how to make that tool work?

Because we can keep it…on our network…and push it across the WAN to the regional LAN servers…damn again. Malware shut the whole network down, and we don't even know where the app is...need to recover projects first...wheels continue to turn...

I never made it to 5, since one of the foundations of the argument was one of the greatest weaknesses we had – our dependency on local and wide area networks that were completely disabled in a cyberattack. While this meant the current state of the content was still available, it couldn’t be updated – and all of our project CAD standards, such as CTB, plot styles and more were also stored there.

At this point we realized that we needed to stop and take an objective look at what we were doing, and research whether there were other solutions available that could solve the problem. But the more I looked at, the more I realized that maintaining standards for every single client we have – into the hundreds – is an incredible labor drag for us and the clients as well. No one client has the exact same standards, even in the age where the AIA National CAD standard that’s been around for decades is uniformly followed and applied…sorry, choked a little on that one.

Let me clarify something for everyone – there’s a huge difference between CAD standards and Drafting standards. CAD standards address software features such as layers, levels, linetypes, fonts, sheet appearance and more. They don’t address what is be presented – like using two lines to represent the inside and outside of the wall, when the complexity of that object is light years beyond that standard. 


But the Drafting standard has been around for nearly a century, where I learned how to create the plan, section and elevation views in such a way that all users, regardless of their standard, could interpret what was placed on the sheet. Born out of the AIA’s Architectural Graphics Standards that were originally published in 1932 (see this link), the series of books explain how to create the views needed to build the structure. Over time, the newer standards for Level of Development have helped the transition from a drafting standard to a modeling standard – which is the key element that makes all of this work. Model LOD is the new lynchpin and key to true digital twin creation.

In the AEC industry, BIM tools and workflows changed all of this by forcing a true 3D representation of the entire object.  Even if it still doesn’t consider all of the studs and components used in the framing, it could be included based on the client Level of Development requirements. But the vertical aspects of the wall previously were a result of the designer’s ability to translate manually from the two lines to an elevation everything that’s going on (and keep it current as the plan changed). In BIM and the 3D modeling world, that’s gone – what you place in the model is used for all types of presentation to explain how to build that wall.

My premise boils down to a couple of simple things. The focus of our tasks has been and always will be the ability to communicate clearly to those that build and manage the structures we live in, work in, and use to provide a better quality of life to all. It’s what should be done to create them in a safe, affordable way, with resiliency and quality. With that being said, the evolution of design authoring tools, such as Revit, Civil 3D, Inventor, OpenRoads, Infraworks, ArchiCAD, and so many more software products we use are taking us further away from the need for a sheet or CAD standard to provide clear and organized documentation…beyond an archaic contract obligation that rests its dependency on paper deliverables…or for pretty linework and text that everyone can read…

The next time you work on a project, put a number on the amount of time you spend adding and organizing sheets, and applying common standards to meet the annotation and appearance requirements of a project. Substitute that number with time spent developing and improving the content used in the model to more clearly indicate design intent and reduce errors, rework and changes on project. Use it to develop more design options and alternatives that could result in a more efficient structure.

So, it’s time to put into place our "5 why’s" on the sheets and the standards. Do this exercise back at your office or with your colleagues and see what you come up with – I’m really curious to hear how it goes on your end. Here are the questions you need to start with, and we’ll review the answers in the next article.

What role does the sheet play in the design process when the outcome is a digital twin?

Why do you need to use sheets on a design project?

What role does the CAD standard play in the design process in the production of 3D modeling-based documentation?

Why is the CAD standard an essential part of the design process?

I challenge every single design firm, contractor and owner to ask themselves these questions. At one point do you walk away from “we’ve always done it this way” and look at new workflows, methods and tools to accomplish the same goal. The cost of not doing it is high – lost time, wasted money and lost opportunity are bits of it. Stagnation and regret are what lets your competition win and you lose every time. But the lost opportunity is the greatest cost of all…so how do you take all of the great progress we have made in technology over my generation, and take it to the next level?

Start here.


Wednesday, September 29, 2021

Help Yourself...Clean up Your System for Better Autodesk Program Performance!

 We’re all guilty of sticking to old habits, but with the advance of technology in our design platforms, some things you might have done in the past are no longer necessary – and can cause more problems than they save. This series of tech tips are here to help you understand the differences in working in old environments such as our old Windows network, and new locations such as loud-based document management systems, including BIM Collaborate Pro, ProjectWise and Sharepoint.

Understanding How Autodesk Programs Use Temporary Files and Space

Microsoft Windows was first released in 1985, as a first “graphical interface” for the “disk operating system”, better known as MS-DOS. Many of the foundational aspects of DOS remain, such as a computer’s need to have one program be the focus of the computer at the time. The system has evolved to allow other applications to remain running and active, which created the need for “temporary files” to stay open in the background.

Autodesk programs such as AutoCAD and Revit have used background files for a variety of purposes:

  • AutoCAD files previously used their own file locking files to prevent more than one user from accessing a file at a time. While the early vestiges of DOS incorporated “restricted access” to files, it was not until AutoCAD 2000 that Windows took over the file locking service through the operating system. The previous DWL file simply tells the system who has the file open. The files are intended to be deleted every time the program is closed…until it crashes.
  • AutoCAD also has a series of backup files that are created, which use .BAK, .AC$, and .sv$ extensions. While there should always be one backup file (.BAK), the automatic save (.sv$) and temporary (.ac$) files should be deleted when AutoCAD is closed…until it crashes. These autosave files are typically stored in a C:\users\username\appdata\local\temp folder.
  • Vertical toolsets and Civil 3D create even more temporary files that are associated with functions of the features in the program – such as other types of temporary files that could be stored in your local c:\temp folder and project folders.
  • Revit has its own infrastructure of temporary and access files since the project model can allow multiple users to safely access one file (unlike AutoCAD). If the model is based on BIM 360 (BIM Collaborate Pro) or Autodesk Docs, then “cached” versions are copied locally so the user is not dependent on accessing the cloud 100% of the time. Caching also improves file performance by storing and updating the local copies via the Desktop Connector application.
  • In addition to the Autodesk programs, other applications can add variety of temporary files that can quickly fill up a hard drive and cause out of memory errors.

How do you know when you need to clean up? It’s easy – get in the habit of doing it on a regular basis to avoid issues in the first place. Do this at least every one to two weeks. But if you start to get errors such as files being out of date, not saving, changes disappear, and files take a long time or do not open at all. Quick note - while this covers Windows 10, Windows 11 will have similar locations. I've added a few notes for version specific items.

Let’s look at how to complete these tasks quickly and easily.

Hard Drive Maintenance

The best way to handle system clean up is to us the Disk Cleanup tools that come with Windows. This tool takes care of your hard drive and makes sure the overall system is as clean and functional as possible.

To perform a disk cleanup, follow these steps:

Before starting this task, make sure that you have closed any open applications, saving your work as needed. Items on the hard drive that are in use may not be able to be deleted or removed, so always close your applications first.

Open the Windows File Explorer tool. When the program appears, make sure the address bar and view is set to This PC – here’s an example that your system should look like:


You’re looking for the main hard drive on your system. Our computers, for the most part, use one hard drive as the storage device. You can see this under Devices and Drives – the PC Name and Drive letter C: are indicated, along with the available free disk space:


An early habit you need to learn is to change or edit something, place your cursor over the object and click the right mouse button. Context sensitive menus, based on what you have selected, will appear, and provide a list of tools and actions you can use on the device you have selected:


For Windows 11:


Be aware that this menu will appear differently based on the applications you have installed on the computer. At the bottom of the list, click Properties, which will always appear there. A new dialog will appear:


The General tab provides the key information we need, including the overall capacity of the hard drive in gigabytes, the used space and free space. Keep in mind we always want to make sure that we never go below 20% of the capacity in free space – so cleanup helps us with this habit. The Disk Cleanup tool is displayed on the General tab and is the only tool you need to use for this step. Select Disk Cleanup to continue:


A list of all items you can remove from the system is displayed. Scroll down the list to review the list, and the bold options are the key ones to select:

  • Downloaded program files
  • Temporary Internet Files – to make sure your internet runs efficiently, clean these files often.
  • Directx Shader Cache – if you don’t do a lot of rendering, you can delete these files
  • Delivery optimization files
  • Downloads – this one can go either way – if you are downloading files from other sources, make sure that as soon as you download the file, you move it from your c:\users\username\downloads folder first if you need to keep the files. Don’t hold on to or store files here – in other words, move it or lose it.
  • Recycle Bin – files you’ve already deleted
  • Temporary Files – this is the main one you want to clean up
  • Thumbnails

 As you select these folders, the description explains what the files are used for, so you can better understand their function on the system. Once you have selected the items to clean up, click OK. You will get a prompt asking you if you are sure – select Delete files to complete the step. A status bar will appear and display the progress. Once this step is complete, you will see a difference in the free space for the system. Click OK to leave the properties dialog.

Cleaning Up Your Cloud - Autodesk Docs/BIM Collaborate Pro

Autodesk introduce cloud-based computing for their products a few years ago beginning with Buzzsaw, and are now at the Autodesk BIM Collaborate Pro/Autodesk Docs products for all projects that are primarily based on their software (including AutoCAD, Revit, Civil 3D, Plant 3D and more). At different points in the project, it’s important to perform maintenance on your local system to make sure your system performs at its maximum potential.

To clean up your Autodesk Docs files, follow these steps.

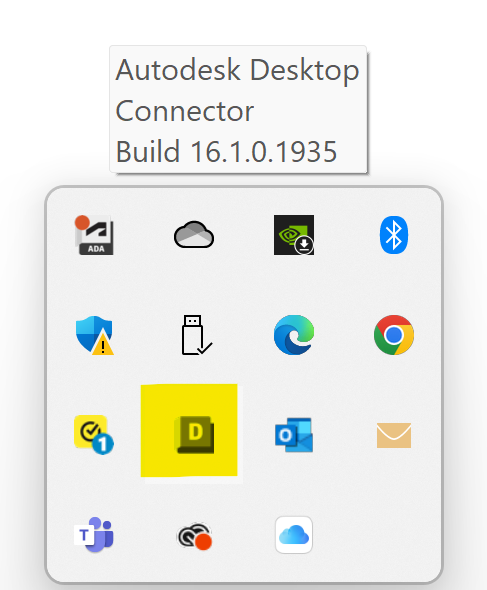
For this first step, you must have the Autodesk Desktop Connector application running, and be signed in to your Autodesk account. You can check this by looking for a white “A” icon in your system tray of the lower right corner of your screen:


If you are not signed in, right click on the icon, and choose Sign In:


After signing in, from Windows File Explorer, locate the Autodesk Docs shortcut – expand it to show a list of all the projects you are assigned to in you business’s project hub. In this case, the example is showing a training project that we want to make sure is cleaned up and current:


Double click on your project – the Project Files folder will appear. Right click on the folder to see the maintenance options:


The two primary tools to use are Free Up Space and Sync.

Sync forces the latest version of the files between your local hard drive and cloud are synchronized – this step should always be performed prior to using Free Up Space.

Free Up Space will remove the local copies of any Revit or CAD files in the project folder. This forces Revit and AutoCAD to download the latest version of the files from the cloud the next time the files are opened.

A couple of rules about this step – this tool will only run on folders and files that you have permissions to access and edit. You can also choose to sync individual files.

Run the Sync command first by selecting that option. A dialog will appear in the lower right corner of the screen, indicating your files are being transferred to the cloud. After the sync has completed, the files in the folders will indicate they are synced with the cloud project files:


Next, right click on the folder and select Free Up Space


A confirmation dialog will appear:


If you return to the folder, the files will now show as online – this indicates that the local copy has been removed, but when you open the file from Revit or AutoCAD, the latest synced version in the cloud will be downloaded again and become the current local copy.

Advanced File Cleanup for Autodesk Docs

If you are a more advanced user, and you are having other issues with project files, you can manually clean up the temporary files that are created with Autodesk docs. Before performing this step, make sure that all changes have been synced, and all Autodesk design applications are closed. You will also need to make sure that Windows File Explorer is set to show hidden files. If you are unsure of any of the steps for performing this task, do not try it alone – contact Autodesk support for assistance.

Sign out from the Autodesk Desktop Connector. Make sure ALL programs are closed (except for this File Explorer).

From Windows File Explorer, browse to these locations (add your username and the version of Revit)

  • C:\Users\username\AppData\Local\Autodesk\Revit\Autodesk Revit 202x\CollaborationCache
  • C:\Users\username\AppData\Local\Autodesk\Revit\PacCache
  • C:\temp (if you are using Windows 11, the temp folders are located in  C:\Users\YourUserName\AppData\Local\Temp).

Delete as many of the folders and files as possible – should any of the files say they cannot be deleted, skip these.

Reboot your system using the SHIFT+Restart option to force a hard reboot of the system. Be aware that a prompt to Continue to Windows will appear – you must select this to continue.

Log back into Windows and check the c:\temp location to see if any additional files can be removed.

Log back into the Autodesk Desktop Connector and resume use of the applications.

Additional Links and Information

For specific directions from the Autodesk Knowledge Network, check out these links:

https://knowledge.autodesk.com/search-result/caas/sfdcarticles/sfdcarticles/How-to-delete-temporary-files-in-Windows.html

https://knowledge.autodesk.com/support/revit/troubleshooting/caas/sfdcarticles/sfdcarticles/Collaboration-for-Revit-Finding-local-copies-of-files.html

https://knowledge.autodesk.com/support/desktop-connector/learn-explore/caas/CloudHelp/cloudhelp/ENU/CONNECT/files/Get-Started-with-Desktop/GUID-714E0D68-6B13-4034-B742-5A91E19EA5B3-html.html

Summary

Using these methods will prevent a project from becoming populated by duplicated and unmanaged versions of the files. Use versioning and the compare tool to review what’s in the files, the sets to replace your old archiving process, and transmittals for sharing – you’ll enjoy a well-formed and managed project.

Monday, September 27, 2021

Help Yourself...Seriously! How To Get Better Autodesk Product Support Online - The System Basics

Several years ago a small group of Autodesk Expert Elites got together with Autodesk and Directly, a third party technical support management site, to help Autodesk resolve more of their open support cases. This program leveraged decades of product experience to provide relevant responses to most support question types. There are some limits - such as we can't reach out to the client during the case and use tools like Zoom or Teams to remote into a system and get more detail. In these cases, we escalate the case to the Autodesk agents, that are allowed to provide this service at a higher level of support.

But it's never easy - there's always a better way to provide these solutions. It's really dependent on the information provided by the user to make sure we understand what is exactly happening on someone's system. Think of visiting your doctor - they're going to ask you a ton of questions before they recommend or prescribe anything, so the more accurate and detailed the responses, the more relevant the solutions will be. And it requires a lot of patience on both ends.

So how do we make this smoother for your typical Autodesk support questions? It's easy - if you're the user posting the question, follow this checklist:

1. Get your software information together first. For Autodesk products, access the program Help page - every one includes a question mark "?" in the upper right corner of the program window. When you select this, you will see the name of the program at the bottom of the drop down menu (it usually says Autodesk Revit, Autodesk AutoCAD, etc. or something similar). Selecting this option will open a dialog, that includes the software version, build number, and versions of any supported vertical tools such as AutoCAD Architecture, MEP, etc. You should see a dialog similar to this:


In this example, the core AutoCAD version is shown, along with AutoCAD Architecture and AutoCAD MEP. Each of these now require separate updates, so make sure you check all three.

This information is critical - we get countless cases where users or their IT departments are not keeping up with the updates, or have not tested them to make they don't cause issues with other applications. But with Autodesk products, the overwhelming number of cases we receive are related to the program simply being out of date, or not the same as other users in the same company or project. These are critical issues that every company needs to address - at a minimum, all users should be on the same build.

2. The computer you are using matters - if it's 10 years old, makes a grinding noise on startup, or is still running Windows NT, it's the problem. But there's a ton that goes on with a computer that every user should be aware of. The key information we need in order to correctly diagnose a case should always include this information:

- The version of Windows - you should be on Windows 10, with version 11 coming out soon. While 7 and 8.1 are supported, they are in  a short life span and are no longer supported by Autodesk (starting with the 2022 versions). You can find the current version of Windows by using File Explorer to locate "This PC" - right click on this icon and select Properties. The right side of the dialog will display a lot of critical information, including the operating system (OS) data:


- The processor and amount of RAM that is installed on the computer - the same dialog for the OS also shows this information under the Device Specifications.

- The size of the hard drive, and amount of free space. It also helps to know if it's not a solid state drive that was used in older systems. To get this, select This PC again - File Explorer will show all installed drives and the total/free space:


When it comes to hard drives, here's a critical item to know - the amount of free space is critical. For example, Revit projects can take up to 10x the size of the file in temporary file space. Add all of the Revit models that are opened, making sure to include the size of the linked models, drawings and more - and you will run out of space quickly if you don't keep up with this. Personally, I don't like for a computer running Autodesk products to have less than 100gb (gigabytes) of free space available. Don't short your computer by buying a smaller hard (500gb or less) - you'll wind up losing time and money when you don't have enough space. Adding a second drive to handle data is also not always a good idea, as the programs typically want to be installed on the C: drive, and adding a D: or second drive can cause configuration issues unless you're knowledgeable about working in this type of environment. Stick with 1TB or larger solid state drives and you'll be good.

- The manufacturer, model and driver version of the graphics display adapters on these systems is also important. Errors with these due to non-supported cards, including old or outdated drivers is a frequent issue. This shows up as graphics on a screen not displaying correctly, crashing when opening or editing views and and other types of fatal errors. To locate what you have installed, from the Windows Search bar, type Device Manager (You can also access this via Settings - when the dialog opens, type Device Manager in the upper left corner of the dialog). When the dialog appears, select the Display Adapters - a list of all adapters will appear that are installed (correctly) on the system:


Every Windows-based computer includes a built-in graphics adapter when a system is built - but in most cases, they are not designed to handle the more intense graphic requirements for most Autodesk software. That's why you usually will have a second video display adapter, if the system meets the Autodesk system requirements. 

To make sure you have a display adapter that is supported by Autodesk, along with a recommended driver, see this list in this link:

https://knowledge.autodesk.com/certified-graphics-hardware?siteID=123112&id=18844534&results=1&stype=graphic&product_group=3&release=2018&os=524288&manuf=all&opt=0

If your device is not listed, it doesn't mean it won't work - but in most cases you want to make sure you keep your device drivers up to date. Here's a link with directions for updating this hardware:

https://knowledge.autodesk.com/support/autocad/learn-explore/caas/sfdcarticles/sfdcarticles/How-to-update-your-system-to-the-latest-certified-video-driver-s.html

Overall - when running Revit, always check the system requirements to make sure your computer meets the needs of the program and version you are running. You can find this information based on product and version from here:

https://knowledge.autodesk.com/support/system-requirements

- Every computer should have some form of antivirus and firewall protection installed. In most cases, this is managed by an IT department or service provider. If your system permissions are restricted (meaning that you can't install or update software yourself), then it can cause some specific failures to occur. In this case, we need to know what manufacturer you are using for the antivirus, such as Norton, McAfee or others, and whether or not you can make changes to this software if needed. In most cases, it is the system firewall that can block access to folders, files and sites needed for Autodesk products to run correctly. Microsoft created this video to help you understand how to find out what types of system security you have installed:

https://www.microsoft.com/en-us/videoplayer/embed/RE3Fq1Y

If you're not comfortable with getting or providing this information, let your support person know so the case can be escalated to an Autodesk agent for a more secure access and connection.

Wrapping up - don't be embarrassed or worried if you don't know this information. In most cases, users really don't have an idea about what's in the computer or how it works. The goal of any good support system is to help you solve your issues, and they can usually walk you through all of these steps to make sure we have as much baseline information as possible. The same rule applies for any support organization you are working with, whether it's your own internal IT department or a software vendor such as Autodesk. 

Hopefully this helps you get the most out of your support - next up, we'll talk about more specific program issues.

Thanks - David B.


Monday, March 23, 2020

Eyes Forward…The Role of Learners in a Technology Driven Society


I recently wrote an article for AUGIWorld (https://www.augi.com/augiworld/issue/december-2019), that I hadn’t really put a lot of planning to but instead tried to speak from the heart, and from what I’ve learned in the 59 years I’ve been here. The response has been overwhelming, and I’m humbled by all the attention and feedback. I didn’t realize what a nerve it would touch, and how many people from different aspects of the design industry would even be intrigued enough to read it. It’s interesting how different emotions drive what and how we do the things we do, and what spurs imagination and thought.

As I returned to work on this follow up, I’m struck by how quickly our perspectives can change. We are currently in the midst of a societal upheaval, with uneasiness and fear striking out from a virus that we know little about. Playing the “what if” game drives everyone crazy, and if you own a business or manage one, you’re having to make a lot of tough decisions.

And in the midst of all of this, narrow eyes can’t see the learning experience we are all waist deep in…how we work, where we work and the benefits to so many things that can be had, if we simply look beyond these fears. I can’t express enough how happy I am to be working for Gannett Fleming – the response we’ve had from our IT services group, and the support from everyone on the board of directors down to the core staff that makes our firm go, has been amazing.

We’ve pulled off something I never thought would happen – take thousands of workers, and shift them to a remote access, work from home business model, where we can continue to do what we need to and serve our clients. I’ll admit – I was nervous, and so were a lot of us that are responsible for making this happen. But I also have strong faith, that guides us and provides the direction and vision we need. It’s amazing what we were able to pull off – but it was the team approach and commitment that made it work, with minimal issues.

Back to the original article - there were a couple of responses that questioned the premise of the article, and a couple more that pointed out phrases that struck home. All were great points, but one response made me think about the one paragraph that no one said anything about – the personal responsibility of your own growth. As we now sit in our homes, and learn new ways to work, you’re gaining a little time – time not spent commuting, traveling or getting to wherever you think you need to be. You’ve been given this gift of time, so how do you best spend it?

The role of college education in a technical society

With our eyes forward, it’s time for a little prognostication. As I sit here and review what our users need to learn in order to help us adapt to this type of change, it’s time to start being honest with ourselves. Based on my own personal experience (and yea, this is my own opinion – I expect everyone’s experience to be different), I’ve gotten far more use of my technical degree than the 5 years I spent wandering through the colleges. This is not a criticism of the schools, but more of my own responsibility.

We need to be realistic that even with all of the critical items an engineer, architect or scientist needs to know, not everyone needs to be in that role. We’re all in a desperate search for that unicorn, as it’s so often referred when searching for that BIM designer, or design technologists that can effectively use today’s tools. We need that design-oriented individual that can create custom structural shapes, form new types of wall assemblies, define the target and source relationship between engineering systems and coordinate the myriad of infrastructure that lies below the dirt. That can do it with a minimal amount of supervision, but with the faith and trust needed to let them get the job done. They’re the ones that can pull the miracle out on a project and get it out the door on time, under budget and with a happy client. Face it – our issues with getting more people into STEM fields are not so much getting younger individuals into the four-year college programs but become the technology experts that can still assemble the building, the structure and the site.

So what does this have to do with the typical four year school? It’s easy – incorporate what we’ve been doing as part of the two-year associate type degree program as the core for the advanced career fields. We get far too many architects and engineers that don’t have the technical capabilities of today’s design platforms. While some colleges are adding BIM, PIM and horizontal design to their curriculum, it’s not nearly enough. This has led to a shortage of technically capable designers that can get 3D models, systems and more assembled in the most efficient way possible.

We’ve also tuned our path for architects and engineers to move almost exclusively towards higher management type positions, such as the project manager, project principal and general business manager. Where is the technical career path that leads this generation towards the deeper thought process needed for simulation, creativity and expression through the tools we continue to improve? Generative design ought to scare the he-double hockey sticks out of every old school professional. The fact that design automation, which can eliminate the redundant CAD and document tasks that continue to control our budgets and schedule, can create its own concepts of how a wheel, chair or building to be designed, should be enough for the design world to stop. We need to start evaluating and altering both technical and professional college programs to move us to lead concepts like generative design and AI – to shape it and make it so we can create the changes to our world that we need.

Make your OWN path

With all of this being said, there’s only one person who can make the choice about the direction for your life and career. In order to break free of the traditional roles and constraints we place on ourselves in the STEM fields as well as our professions, we need to be able to make an honest assessment about our own career paths. But it’s a choice that we as individuals must make. You must be able to challenge yourself…

One great pointy-eared science officer once asked…“Is this all I am? Is there nothing more?”

This past year, as part of my new role, I’m taking the responsibility of redefining our technical training curriculum and programs. The logic I’m using is simple…where do you want to go? We are obligated to maintain our skills in the roles we take. For example, the architect still has to be the great aggregator, pulling all of the different pieces of the built environment into a cohesive structure. We have the job requirements clearly defined…the classes created…the expectations and goals needed to fulfill the job’s obligations clearly enumerated.

The hard part is getting outside of the role and looking at the right kind of “what if” scenario. Not a negative consequence, but a personal growth, desire or ambition. Let’s say I give you the opportunity to define the role in your own image. What would you do different? What do you need in order to be able to make this kind of a change?

OWN can become a simple acronym…opportunity, wants, needs.

How do you take advantage of the opportunity to define your own path?

How do you clarify what you want to accomplish?

What will be needed to make it to this goal?

By taking some of the gift of time we’re being given to do a little self-assessment, you’d be surprised what you may come up with. With the help of our online training providers at Eagle Point, I’m setting up OWN Learning paths, that each employee in the company can fill out. We’re going to provide them access to all of the training materials we have in our system. No limits. No restrictions. But a chance for them to challenge themselves; document it; and pursue it. The system can hold them accountable for reaching this goal – but it’s still up to them to take the steps. The employee has to be willing to make the commitment to themselves and make an investment of their own time.

The Rule and Conclusion of a Happy Business Life

Knowing the difference between the company’s obligation and your own personal responsibility…that’s a tough one for us to take. If you listen to today’s politicians, which in most cases can’t even be honest with themselves and much less us, one side would have you believe that a “corporation” is nothing but pure evil. But the other side knows that corporations are people. And in some cases, allows them to take advantage of their staff, driving them towards unrealistic conditions that make it impossible to have a satisfying career.

So where does training and career development fit in? Where’s that fine line, the tune that strikes the right note, the right pitch, and makes everyone go…ahhh?

It’s a trade off. It always has been.

So here’s some comments that as an employee, you should never make.
“I’m entitled to free training.”
“If I’m not getting paid for it, I’m not going to training.”
“It’s not my responsibility to learn how to do that.”
“I don’t have time.”
“My clients don’t want it, so I’m not going to do it.”
And my personal favorite…”I’ve always done it this way, and don’t see a need to change it.”

At the same time, the employer can’t carry these rationalizations forward:
“There’s no money in the budget for training.”
“Learn on your own time.”
“I expect you to do this, and I don’t care how you figure it out – just get it done.”
“You should already know how to do this.”
“My way or the highway.”
And of course, my personal favorite…”We’ve always done it this way, and don’t see a need to change it.”

Here’s the big takeaway – in order for a business to have a successful relationship with their employees, it has to be sold and delivered as a partnership. Training, learning, education…should all be part of the employment experience. Great managers know that their role has always been one of service – so from the business standpoint, we have an obligation – and the employee does NOT have a right – to train. I always loved the quote that it’s better to train someone and have them leave, than not train them and have them stay. The greatest way to cripple a business is to become a static point in time, where they no longer see the need or benefit for improving and changing what they do. Ask anyone who still has a boom box or eight track player if they’ve reached the pinnacle of life…if you can still find them.

But at the same time, the employee needs to approach the business as an owner. You have to take the responsibility of owning your skill set.

Of not settling for the static point in time.

Of challenging yourself.

Of taking your own time to learn.

It’s tough to do. Life is busy. It takes. It also gives back what you invest in it.

We blind ourselves to what others need because it’s easy. We cripple ourselves, because we allow others to dictate to us what we’re capable of. But this biggest shame is when we don’t try. When you get to a point in your career when you think you learned all you can, you let yourself down.

But with your eyes forward, the objective is to get past previous mistakes, missed opportunities and failures, where you can stop looking at what’s holding you back, and get to where we all want to be.

I’ve been in it myself now for approaching four decades. And with all that life is throwing at us, the last thing we need to be doing is giving up on ourselves and our potential for what you – and we – can be. I’m not quitting on being a learner…are you?

Wednesday, July 3, 2019

Welcome to the New World…

It’s been way too long…but nowadays it’s tough to really find time to sit down and put thoughts to paper. Work/life items have their own balance that take precedence, and it’s easy to let time slip you by. But it’s been a journey I wouldn’t trade for anything in the world.

Ironic as it is, I just received my first promotion based on performance in the engineering world. Most of the time, it was a case of just taking on more responsibility or changing jobs to get ahead. That’s the nature of the technical world, which unfortunately means the design world never has really figured out how to retain and keep good people. But this time around, I was sticking around for a lot of good reasons – not as much financial as wanting to see things through. It was one of the reasons why I left the reseller channel, which is even worse at recognizing and rewarding talent. Getting to see a project completed and in use is still a real kick to me – good or bad, no matter what happens, it’s one of the best things to be able to say, I had a hand in making that happen.

So, my new role is Engineering Technology Manager – and we’re still really working out what that means, but in this role,  we’re making two important changes. First was the practice of embedding technical representation on our business line practice leadership teams, and second was to regionalize these positions to help us focus on the needs of the area, rather than spending a lot of time crossing the country. We’ll still be doing everything we did before, but the focus really helps, as we can now more specifically target the technical needs of the people that do amazing work for us. The tools, as they are, should not hamstring the teams, or at best help them radically change their workflows so we can get back to the right work/life balance. It gets frustrating to watch team members working substantial overtime, or never be able to leave for vacation without taking the apron strings off.

Left to Right: Richard Binning, Eric Blackburn and Mike Massey at Guardsman Pass, UT


Over the past week, I’ve gotten to spend some amazing time with BIM managers and directors from across the country to help define what it means to be a BIM manager…or whatever the role name is, but a leader for technological change. It was really fascinating to hear all of the different ideas from people who have had this role for some time, and to really try to understand how to quantify this position. As an industry, we’ve really had a backwards view of the impact of technology. It’s akin to giving someone a hammer, who then promptly uses the handle to pound in the nail – and then have them refuse to see why what they’re doing isn’t what that part of the tool is designed for.

Throw in a nail gun – but it’s useless if you don’t understand all of the coincidental parts to make it work. Without a compressor, or a hose long enough so you’re not moving it around all day, and don’t forget the electricity, nails, and Band-Aids for when you miss). I’ve been doing some carpentry work in the house trying to get it ready to sell, so we can move to the coast and get more out of the life we seem to be stuck in today. That nail gun is a hell of a lot better hammer that my old one, and I’m getting more done with than I ever did by muscling it the old way.

This is where BIM technology is today – and the rate of adoption and adaption is accelerating at a higher rate than even just a couple of decades ago. Reviewing a project on my phone seemed like a pipe dream when CAD came out, but now a millennial expects you to provide the phone, the software and the latte’s to help them work faster in fewer hours per day.

So, my first steps are going to be step back and take inventory of what we have and do – and figure out where the gaps are. Who’s still on AutoCAD 14…who’s using their phone to do a three-way Skype call and share a project on the phone so I can help them figure out what’s happening with design options. Who’s told their users that you don’t have time for training…and who’s taking the software and laptop home at night so they can get better at their job. Too often, we spend way too much time bemoaning between the haves and have nots, and not enough time figuring out how to lift all up, instead of tearing some down. I’m a firm believer in the former – that you don’t get anywhere by taking things away from people, but instead putting the time and tools into those that don’t so they can get ahead. The only ones I’m less likely to help are the ones that won’t instead of the ones who can’t for whatever the reason.

One of the big takeaways I had from the meeting last week was in regard to identify roles and responsibilities for a typical BIM Manager. As we mind-mapped the daylights out of the tasks, we (led by my buddy Mike Massey who deserves the credit for this) came up with four key categories that address these tasks, that all add up to PIE2:

  • Planning and Research – this category relates to the preparation a BIM manager needs to be doing to help move and keep a company in the right mindset for BIM workflows:
  • Implementation – setting up all of the background tools, tasks, documentation, standards and more that sits behind what BIM applications and workflows need;
  • Education – stepping back and looking at technical training from a different light, and being able to take the best of what we’ve learned about education delivery methods and integrating them into today’s technology to provide a better learning experience;
  • Execution – no, we’re not shooting people, but we are shooting for PAC – better productivity, more accuracy and improved coordination. The BIM manager has to understand how to execute everything in the previous categories and apply to the new project world. How to run more efficiently from go/no-go, project execution plans, design phases and post design tasks in all disciplines, a variety of project types and with a wide variety of user abilities and tools…a witches brew indeed.

So, taking a step back and looking at the big picture – what does it take to make a good BIM Manager? Patience? Virtue? Irreproachable technical expertise? An affinity for the keyboard and mouse that can’t be explained? A certain level of insanity for taking all of this on?

As I’m staring down the R word in my somewhat near future, I’m really appreciating the confidence from my leaders to challenge me more and take on this role to help solve these issues. There’s going to be days when I want to pull all eight hairs left on my head out, and others when I’ll feel like a proud dad when I see the lightbulb go on for someone who’s struggled. Wouldn’t you?

Friday, January 12, 2018

AU 2017 and End of Year Wrap Up…Time’s Flying!

When I started this article, I was just getting back from the Thanksgiving break, and busy pulling out Christmas ornaments. One of the things I’m liking the best is moving AU from after Thanksgiving to before, as it gives me more time to spend with family and friends over the holidays, and not feel so rushed. So this, we took a little pre-vacation, and spend some time in Park City, UT before driving down to Vegas.


If you ever get a chance to visit, I highly recommend it. The Waldorf Astoria we stayed in displayed that customer service, done correctly, is what makes a trip like this a memorable experience. The items that don't cost a thing - like remembering guest's name, saying hello in the halls, and making sure everything is perfect for your stay...reminds me that it's the little things found in kindness that makes a difference.


So a couple of personal notes. 2017 was my last for producing training videos for 4D Technologies and CADLearning.com. I really liked working with the crew, and learned a heck of a lot about producing a web-based training program. In my eyes, Dan Dolan and Matt Murphy have the best online training program for Autodesk products out there.  My leaving has more to do with finding the elusive item known as “free time”, as my projects around the house have been piling up lately. Combined with my involvement with the Expert Elite and Directly programs, plus expansion efforts with technology at work, had me working way too many hours, nights and weekends. I’ve also been itching to get back to writing for the blog, as the industry is going through some pretty serious changes now.

On AU 2017. You ever have one of those days where you know you can do better than what you do, and wish you had done things a little different? That’s how I left Vegas this year. Adam Sopko and the AU staff are really starting to push the boundaries of what a tech conference should be, and the additional benefits and features really leave me believing that 3 days (plus a pre-day) aren’t enough. I’m wishing we would go back to a 3 ½ day full event, and get the labs back on Fridays again that would go 3 ½ hours.


Part of that is my own fault. Last year’s Perfecting the System for Revit lab, we were able to cover everything, but this year, I couldn’t get it done, and wanted to apologize to all the attendees. I should have shortened up the first section to focus on the system behavior, but hope that the handouts are detailed enough to fill in the gaps. My other regret was agreeing to take on some new technology for a lab – the attendee interaction tool, Freeman XP Touch. Before you react, I want to point out that I really support this – I like the idea of attendees being able to ask extra questions and poll questions during the class, but the technical hiccups basically amounted to a dry run during the class. The attendees shouldn’t pay the price on the time we’re allowed, so next year, I would encourage the AU staff to plan this out a little better. Two weeks notice on this type of change isn’t enough, even though we had worked the kinks out by the last class.

The other thing that it convinced me to do was to shorten up my presentations. Here’s a note to all speakers – you can put all the detail you want in the handout, but if you’re writing novels like I do, don’t try to present it all. Shorten it up to the key points, and keep the live parts to main areas, without doing too much. I’ve been speaking long enough that I should have known better, and probably would not have stressed out as much as I did this year. I’m also going into self-cap mode – four classes is a little much, and took away from my time to enjoy the event. There’s so much going on, that I really need to get back into more classes myself, especially on the Forge/Quantum side of things.


Back to the event – the AEC keynote was the only one I could attend, but I’m really excited about seeing where my industry is headed. As I look at all the different programs, getting them all to play together in the same sandbox is challenging. I think the best way to simply the concept is to break it down into a couple of ideas.

The data associated with any physical representation of an object – such as dimensional, electrical, mechanical, etc. – is one of the most critical components of a design. Regardless of the delivery of this information, keeping the data in silos – Revit, Inventor, AutoCAD, etc. – is what keeps projects bloated and slow, as well as uncoordinated. Pulling the data out in a cloud database, where the design models can access it directly and without duplication – is a critical step towards true generative design. Just the act of syncing this data across multiple applications that all handle the information differently, is incredibly time consuming. But pulling it out of the modeling program and into its own environment could free up the modeling programs to focus on the design itself, and allow more parts to interact with other.

Generative design represents the next evolution of BIM, and with Quantum on the horizon, it will be interesting to see how 3D modeling evolves. But as an MEP user, it can be tough to quantify, so what would I look for in this realm?

A few features of generative design I would like to see may look like this:

- The MEP geometry should recognize rules on interferences, so they can automatically prompt, or even respond, and reroute, without having to spend excessing time working out alternatives that don’t alter the design criteria of the system, such as air or fluid flow.
- The electrical connector should recognize the available resources, such as panels, and be able to create connection during placement (as opposed to a post-placement editing task), as well as maintain electrical design criteria, without having to depend on spreadsheet and hand-based calculations. For example, the electrical code states what apparent load in VA is translated to for a circuit, based on the horsepower of a pump - adding that table based on rules should be an easy add, rather than through tedious if/then programming in an external text file.
- Control systems in the model should be able to be maintained out to the end user, and integrate with the control software. Water, wastewater treatment, chemical and biological manufacturing and more should be integrated into the BIM environment – and the data related to usage be able to provide feedback in real-time to the designer that needs to make modifications and improvements over the life of the equipment. This requires better integration between Inventor and Revit, eliminating the “conversion” process that’s currently required.

These were just a few of the takeaways I had after listened to the keynote, and talk to other attendees. So what do you look forward to in 2018? Where do you think the future of making things is taking you? In my case…hopefully towards a fish that knows where I am and when to jump on hook…and then fillet itself and season just nicely so.


Overall, AU 2017 was a blast. The Venetian/Palazzo/Sands is a perfect place to hold this event, and the crowds were well served. The exhibit hall this year included a caricature artist - and yes, mine is my new avatar. The special events, where users got to meet with and share ideas with product managers, like Martin Schmid, help give us the sense that Autodesk is keenly interested in your input to help make the products better.


AU is also about connecting with friends, cohorts and like minded geeks. This year's Wednesday night event was a little hectic (way too many people in Tao), nothing beats sitting down with some of my friends and mentors, and catching up. Always great to see these guys - they're the best in the industry, and make AU the great event it is.


Two of my coworkers that attended came back motivated, and loaded with information and ideas that could help them produce higher quality work. It’s great to see younger people (i.e. those a couple of generations removed) really get into the technology that has made my career. This year looks to be promising, so stay tuned…

Happy New Year! David B.

Thursday, May 25, 2017

AU 2017 Proposal Time – and now you can Vote!

I’ve been a speaker at AU for a long time now (well, about 13 times) and every year it’s challenging to come up with new and updated topics. But this year is a little different – for the first time, you, the user, can vote for the classes you would like to see. So if you have a topic, like learning Dynamo for Revit, understanding how to bring Inventor families into Infraworks, or gain a better understanding to make your AutoCAD documentation look and behave like Revit documentation, then you get to pick until June 16th. It won’t be the only criteria used to pick a class, but it will be an important one.
So here’s what I’ve ponied up for this year. You can vote by following this link:

http://au.autodesk.com/speaker-resource-center/call-for-proposals/voting

Perfecting the System for Revit

Last year’s co-winner of the top lab at AU 2016, this lab set several firsts. It was a first for me as a two time winner from 2011 and 2016, but the key part was how we taught the class. We covered three tracks – duct, pipe and electrical – at the same time, showing the similarities and highlight key points for each system type. The handouts were the most detailed I had written for an AU lab – an overview, one for each track, and a key points document to narrow it down. Here’s the lab description:

“Revit systems help us to define the mechanical, electrical, and plumbing design in several ways, but the main purpose is to understand the relationships between system equipment, such as air terminals to air handling units, or from light fixture to panel. This multiple-AU award winning lab will teach you the key steps needed for controlling project system settings, and then demonstrates how to capitalize on (or disable) sizing and analysis tools related to the system. We’ll cover creating the target-source relationship between parts, and then we’ll review using the systems to improve the quality of your documentation. On top of this, you’ll get a project template that already defines everything in the class, so you can take advantage of these topics right away. The class will cover HVAC (heating, ventilating, and air conditioning), piping, and electrical items, so come and join us for this fast-paced but thorough lab—you’ll be glad you did! This session features Revit MEP and Revit.”

- Learn comprehensive steps for controlling project system settings, including mechanical and electrical system project settings
- Learn how to capitalize on the system sizing and analysis tools, and learn how to maximize project performance when you don't need these features
- Understand how to create the target and source relationship between equipment without routing a duct, pipe, or wire
- Learn how to improve the quality of your construction documents by capitalizing on system-based features

Managing BIM Projects Without Going CRAZY

This course was featured as a live event a few years back, and was one of the most watched online sessions for the AU site. Working from a higher level, this class is geared more towards the BIM manager and focuses on high-impact areas of an implementation. We’ve also added some new features to cover from the 2018 release. With the inclusion of fabrication tools in Revit 2018, we step back and learn when and why you would use this content, over the default design content that’s already been shipping with Revit.

“This course covers effective practices for project managers, architects, engineers, and designers working on Building Information Modeling (BIM) projects for all areas of architecture, structure and MEP systems. Learn how AutoCAD and Revit software have altered the traditional design workflows and processes, and discover how to manage the disruptive changes. The course will cover pre-project planning, dealing with project content and understanding what tools can really help the project bottom line. We will also review key CAD and BIM standards, and where Revit software alters typical project tasks for higher levels of development. The course is well suited for the first-time manager and experienced user. If you're ready for an energetic, fast-paced class that packs in a lot of information, then sign up early and often!”

- Discover key points for the project execution plans and staffing
- Understand how to clearly define CAD and BIM tasks for a project and how standardization between both should be approached
- Learn how to migrate third party content and filter essential data into a project family
- Examine different levels of development (LOD), and when to use design versus fabrication tools

I also added two new classes, including one on AutoCAD that was based on training demands we’ve had at our firm, Gannett Fleming.

AutoCAD versus Revit - Common Annotation Tips and Tricks

We still have a lot of AutoCAD users, but it’s kind of surprising how few of our users have really had any training on AutoCAD. As part of a standards initiative, we discovered how little (and how poorly) many of our stuff used features such as annotative scaling for text, dimensions and blocks. We also had some attempts at dynamic blocks, but only a handful of user understood how to use them, much less make them. So this class was born out of the need to create similar workflows and use tools that have the same behavior in both AutoCAD and Revit.

“When you have a lot of old school and productive AutoCAD users, sometimes it can be tough to get them into the Revit way of thinking. One way to get these users on board is to help them relate AutoCAD features to Revit tools, and learn how these similar tools can increase their productivity. In this lesson, we being by learning how annotations such as text and dimensions are controlled by the scale of the drawing. Next, we review the similarity of dynamic blocks in AutoCAD and Revit 2D symbol and annotation families. We examine how actions and parameters in AutoCAD help the user match Revit family placement behavior and features. The session closes by learning how to make AutoCAD dynamic blocks behave more like Revit family types, using visibility and lookup tools. If you need more consistency between your AutoCAD drawings, and Revit documentation, come join this old timer to learn some new tricks, and get a cool template to help you get started!”

- Learn how to define AutoCAD annotative Text, Multi-Leaders and Dimensions to match Revit annotation types
- Understand basic similarities between AutoCAD dynamic blocks and Revit 2D symbol families
- Review specific dynamic block actions and features that emulate Revit behavior
- Examine how dynamic block visibility and lookup table features are similar to Revit family types

Last, but not least…we’ve been working with Autodesk for the past few years to gain a better understanding for methods that link drawings and models together, and share the data seamlessly between programs. Without going into too much detail, the end result is a new product that is now in public beta.

Taking Your Data into the Cloud: Introducing the Revit P&ID Modeler

“In the design world, it’s not uncommon that key project data is stored in application silos, and requires a great deal of manual coordination. Autodesk has taken the first steps for AEC projects to make data available to multiple applications at once, by introducing a connected workflow that shares data from schematic diagrams with a Revit project. The Revit P&ID Modeler breaks silos down by letting the user begin with P&ID schematics in AutoCAD Plant 3D to create intelligent, data rich diagrams. The schematic data is hosted in the Autodesk 360 cloud and is referenced by Revit project models. The 3D model consisting of elements such as piping, equipment, and accessories, is then developed using information defined in the schematic, such as pipe size, type, valve type, and equipment IDs. As the model is developed, and the schematic iterated, the user receives feedback to help ensure consistency and design intent is maintained. Join us to see the next evolution of Autodesk design tools.”

- Learn how a process and instrumentation diagram is defined in AutoCAD Plant 3D, and to determine the key data to be shared
- Understand how to define a hub in the Autodesk 360 environment, and how to prepare for sharing this data with other modeling tools
- See how the Revit model is associated with a hub project, and how the P&ID model interface is defined
- Examine how design data is tracked and coordinated during the modeling process


So that’s my classes in a nutshell – we’re taking some old school to the next level, and jumping in early to get a peek into new products that can really streamline the design process. Vote early and often – I appreciate it!